
The puddle under your car is the easy part. Working out the actual power steering fluid leak causes is where most people get stuck, because fluid almost never drips from the part that failed. It runs down a hose, tracks along the subframe, and falls off at the lowest point it can find.
Here's the number that reframes the whole problem: a typical hydraulic system holds about one quart of fluid and runs at roughly 1,000 to 1,500 psi. A small weep under that much pressure empties the reservoir faster than most drivers expect. Manufacturer service data puts the return hose and its spring clamps at the top of the failure list by a wide margin.
Everything below starts with those five causes, then works outward from there.
Power Steering Fluid Leak Causes
Power steering fluid leak causes come down to five things. Worn return hoses and spring clamps top the list. Pressure line fittings, pump seals, rack seals and cooler lines make up the rest.
Wrong fluid and overfilling speed the damage up. Most leaks start small and cost little to fix early.
The Five Causes, Ranked by How Often They Show Up
Ranking matters more than listing. A generic list of causes treats a $5 clamp and a $900 rack as equals, and that's how people end up authorizing the wrong repair. Here's how the failures actually stack up in shop practice, with parts pricing reflecting typical US aftermarket ranges as of 2026.
| Failure point | How often it's the culprit | Typical parts cost |
|---|---|---|
| Return hose, spring clamp, or reservoir O-ring | Very common | $5 to $60 |
| Pressure hose at the crimped fitting | Common | $60 to $180 |
| Pump shaft seal or pump O-ring | Common past 100k miles | $15 to $60 for a seal kit |
| Cooler line rust pinhole | Regional, heavy in the salt belt | $40 to $150 |
| Rack end seals or pinion seal | Least common, biggest bill | $300 to $900 rebuilt |
The pattern in that table is worth sitting with. The cheapest parts fail most often, and the most expensive failure is the rarest. That's good news for your wallet, as long as you diagnose before you authorize work.
The second thing to understand is that most "rack leaks" are not rack leaks. A rack only earns replacement when an internal seal has failed and pressurized fluid has filled a boot. A weeping fitting above the rack drips onto it and looks identical from underneath.
Third: sealed system, sealed problems. Fluid leaves a hydraulic system in exactly two ways, past a seal or through a joint. There's no combustion, no evaporation, no consumption by design.
If the level is dropping, something physical is passing fluid, and the drop rate tells you how big the failure is.
If your car has electric power steering, stop here. EPS has no fluid, no pump, and no reservoir. A leak under an EPS car is engine oil, coolant, brake fluid, or transmission fluid, and you'll waste an afternoon chasing a system that isn't there.
Check for a belt-driven pump and a reservoir cap before anything else.
Why a Power Steering Leak Is a Safety Problem, Not Just a Stain on the Driveway
Steering assist isn't a comfort feature. It's the thing that lets you place the car precisely at highway speed with two fingers on the rim. A leak is the slow, quiet path to losing that.
The failure mode that hurts people is sudden assist loss, not a wet driveway. A rack seal can let go in one corner and the wheel goes heavy mid-turn, which is exactly when you have the least time to react. Steering-assist loss complaints logged with NHTSA reflect that pattern, and it's why this topic deserves more respect than a generic maintenance list gives it.
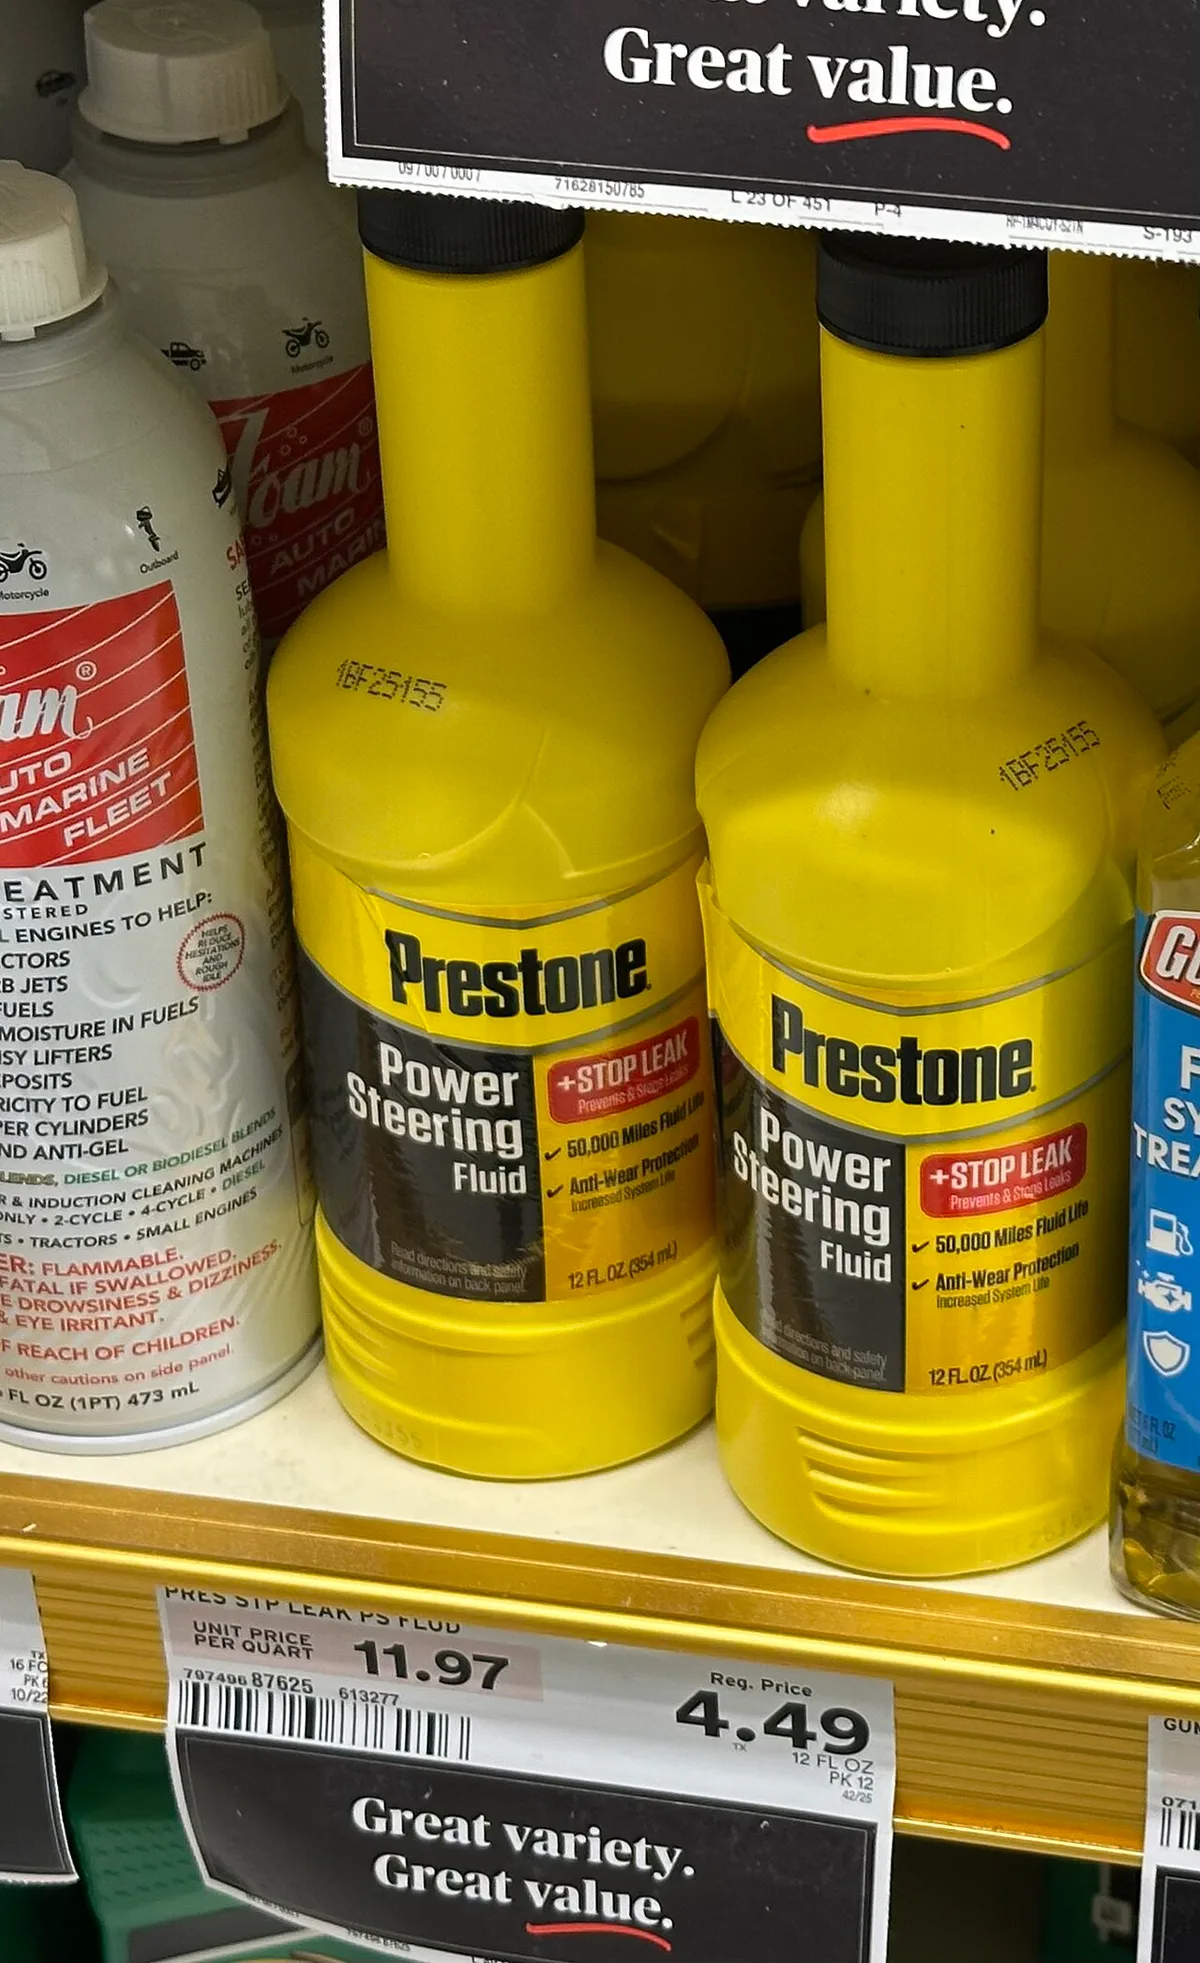
Image source: Wikimedia Commons / Jonathan Schilling (CC BY-SA)
There's a fire angle too. Fluid that lands on a hot exhaust manifold or catalytic converter can ignite. The reservoir itself gets hot enough to scald you after a twenty-minute drive, so keep your hands off that cap until things cool down.
Then there's the practical hazard of the diagnosis itself. Getting under a car on a jack alone is how people die in driveways. If you plan to crawl underneath, a jack is not enough, and your own wooden ramps can be sturdier than cheap steel ones.
And when the pump is whining and the wheel is heavy at idle, you're past the point of nursing it home. Knowing where a tow strap hooks is worth thirty seconds of your time before you need it in the rain.
One more layer of risk: misdiagnosis. A stop-leak additive poured into a healthy rack to chase a hose leak can swell seals and contaminate the spool valve. That turns a forty-dollar hose into a four-figure rack job.
Accuracy here isn't academic. It's the difference between a weekend wrenching session and a rental car.
We'll get to the exact point where driving stops being an option. First, you need to understand what you're actually looking at.
How Hydraulic Steering Works, and the Few Places It Can Lose Fluid
The system is simpler than it feels from the driver's seat. A belt-driven pump, sometimes electric-motor-driven on electro-hydraulic setups, pressurizes fluid and shoves it toward the steering gear. The gear converts that pressure into assist.
Fluid then returns to the reservoir and the loop repeats.
That's it. Pump, pressure side, gear, return side, reservoir. Five elements, and every leak lives in one of them.
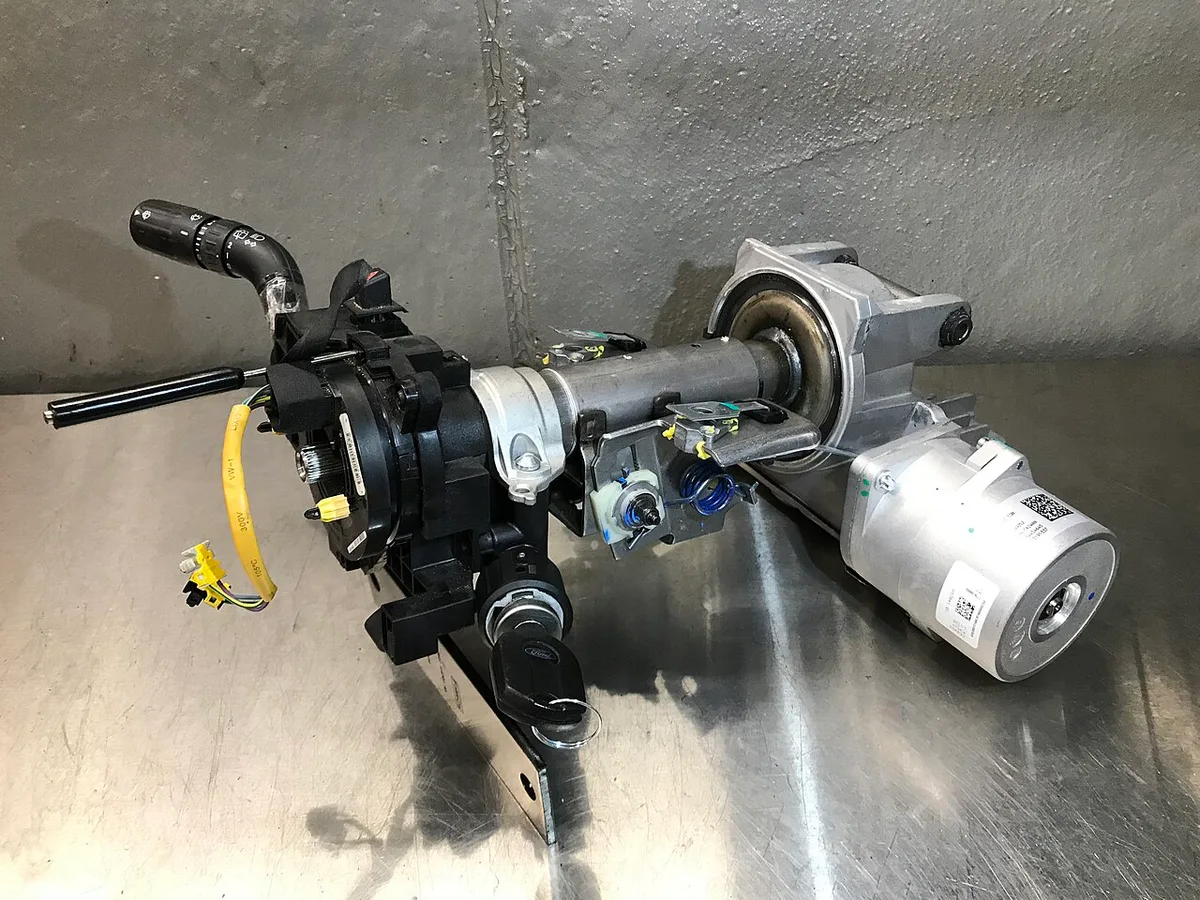
Image source: Wikimedia Commons / Samf4u (CC BY-SA)
Pump and Reservoir
The pump is a vane or roller type, spinning constantly whenever the engine runs. Its shaft passes through a seal to reach the pulley, and that seal is a wear item. The reservoir sits on top of or near the pump and feeds it through a suction hose.
The reservoir cap deserves attention, because it's not just a lid. It carries a dipstick on most designs, with hot and cold marks, and it vents pressure. A clogged vent lets pressure build and pushes fluid out past seals that were fine yesterday.
Pressure Line, Return Line, Suction Hose
Three hoses, three very different jobs. The pressure hose carries the full system pressure, usually somewhere around 1,000 to 1,500 psi, with spikes higher at full lock. It's reinforced, crimped at the ends, and often partly metal tube.
The return hose carries low-pressure fluid back to the reservoir. It's soft rubber, held by a spring clamp, and it lives in the hottest, dirtiest part of the engine bay. That's why it's the most common leaker in the whole system.
The suction hose feeds the pump inlet. Cracks here tend to suck air in rather than push fluid out, which produces whine and foaming instead of a puddle.
The Steering Gear
Rack-and-pinion units dominate passenger cars. Recirculating-ball steering boxes with a sector shaft show up on older rear-drive vehicles and heavier trucks. Both do the same job with the same weak points: input shaft seal at the top, end seals at the rack, and internal spool valve seals.
The rack ends in tie rods bolted to it, which pass the push out to the wheels. The rubber boots on those joints are dust seals, not fluid seals. Remember that distinction, because it solves a very common misdiagnosis later.
Why Pressure Matters to a Leak
A seal that holds fine at idle can weep under load. That's why so many leaks only show up after a drive, and why a cold car in the driveway often looks dry. Heat and pressure open the gap.
This single fact shapes the entire diagnostic method.
Reading the Evidence: Fluid Color, Smell, and Reservoir Clues
Before you jack anything up, read what's already on the ground. The fluid tells you which system is leaking, how long it's been leaking, and how badly the pump has suffered.
What the Color Is Telling You
| What you see | What it usually means |
|---|---|
| Amber or gold, thin, fairly clean | Mineral-based OEM fluid, likely factory fill |
| Red or pinkish red | Automatic transmission fluid used as power steering fluid |
| Dark brown or black with a burnt smell | Overheated fluid, pump likely run low |
| Milky pink or frothy | Air or moisture whipped into the fluid |
Burnt smell is the one to take seriously. It means the fluid has been cooked, which almost always means the pump has been running short of lubrication for a while. A pump in that condition is on borrowed time even after you fix the leak.
Telling Power Steering Fluid Apart From Its Lookalikes
Engine oil is black and gritty, and it smells like fuel and combustion. Power steering fluid is cleaner and slicker, and it usually smells faintly sweet or chemical. If you're already familiar with chasing oil in odd places, the same logic applies here.
Follow the wet trail, don't trust the drip.
Brake fluid is the dangerous one. It's clear to pale yellow, it strips paint, and it feels slippery in a different way. On vehicles with a hydroboost unit, brake fluid and power steering fluid share a hydraulic circuit and sit in the same neighborhood.
Getting that wrong is a brake failure, not a steering annoyance.
Coolant gives itself away with a sweet smell and a green, orange, or pink tint. Gear oil announces itself with a sulfur stink that doesn't wash off your hands quickly. Transmission fluid is red, which is exactly why it gets confused with power steering fluid on the ground.
Reservoir Clues Most People Miss
- The dipstick reads cold when the engine is warm. A sign of a serious leak, not a small one.
- The fluid is above the full mark. Overfilling causes foaming, aeration, and overflow that mimics a leak.
- The cap hisses or weeps. The vent is blocked, and pressure is finding its own exit.
- The fluid is dark but the level is fine. Someone has been topping up and not fixing anything.
That last one is more common than you'd think. Repeated top-ups mask the leak rate, which is the single most useful number in this whole diagnosis.
The Fluid Spec Question You Can't Skip
Power steering fluid is not one universal product, whatever the bottle at the parts store claims. General Motors specifies Dexron VI in many hydraulic systems, Ford calls for Mercon V in some applications, Honda wants its own PSF-S or PSF-II, and plenty of European models want Pentosin CHF 11S or CHF 202. Chrysler has its own specification too.
Get it wrong and the seals pay. Mineral-based and glycol-based fluids attack different seal materials. Nitrile and Viton swell or harden when the chemistry is wrong, and the failure shows up months later, long after you've forgotten what you poured in.
If you already know the care that topping off a transmission demands, apply exactly that discipline here. The owner's manual is the authority. Universal claims on a bottle are not.
The Leak Map: Component-by-Component Causes
Now that you know what's in the system and how to read the evidence, work through the components in order of likelihood. This is the section to come back to with a flashlight and a rag.
Return Hose, Spring Clamps, and Reservoir O-Rings
Start here, because this is where most leaks live. The return hose runs at low pressure, sits close to heat, and is held by spring clamps that lose tension over thousands of heat cycles. The rubber hardens, the clamp loosens, and a weep begins.
Look for a damp, grimy patch rather than a clean drip. Dust sticks to a slow seep and builds a dark crust over time, which is often easier to spot than the fluid itself. Squeeze the hose.
If it's rock hard or leaves black on your fingers, it's done.
Reservoir O-rings and the pump-to-reservoir joint fail in the same way. So does the reservoir body itself on older plastic tanks, usually at a seam. These are the cheapest fixes in the entire system, often under twenty dollars in parts.
Pressure Line, Crimped Ferrule Failures, and Banjo Bolt Washers
The pressure hose fails at its ends far more often than in the middle. The crimped steel ferrule is where rubber, reinforcement, and metal meet, and that's where corrosion and flex fatigue concentrate. A seep at the ferrule shows as a wet ring around the crimp.
Banjo fittings add two crush washers to the equation, one on each side of the bolt. Those washers are single-use. Reusing them, or omitting one during a rushed hose swap, creates a leak that looks exactly like a failed hose.
High-pressure leaks spray a fine mist when the engine runs. That mist lands on everything nearby and can reach the exhaust. If you see fresh wetness spreading fast, shut the engine off and treat it as urgent.
Pump Shaft Seal and Pump O-Ring Failure
A front pump seal leaks out behind the pulley, which throws fluid onto the belt and spreads it in a line. Look for a radial spray pattern on the hood liner or inner fender. That pattern is nearly diagnostic on its own.
The pump's internal O-rings fail with age and heat, and they fail faster when the fluid has been low or wrong. A leaking pump also pulls air, which produces the classic moan at idle and a stiff spot when you first turn the wheel in the morning.
Metal debris is the hidden consequence. A pump running dry sheds material that circulates through the rack, so a cheap pump leak can quietly damage the most expensive part in the system. That's the strongest argument for fixing a noisy pump promptly.
Rack End Seals, Pinion Seals, and the Wet Boot Giveaway
The pinion seal sits at the top of the rack where the steering column input enters. It leaks downward onto the subframe, and because it's high up, the drip lands well away from the actual source. This is the classic case of a puddle that lies about its origin.
Rack end seals are internal, so they don't drip on the ground. They leak into the rubber boots at each end of the rack. Squeeze a boot and listen.
If fluid runs out, the internal seal has failed and the rack is the problem, not the boot.
That distinction saves people a lot of money. A wet boot is not a bad boot. A wet boot is a bad rack seal, and boots are cheap because they're not holding fluid in the first place.
Rack replacement also means an alignment afterward, and on many modern cars a steering angle sensor reset through a decent scan tool. Budget for both. A rack swap without an alignment eats tires.
Cooler Lines, Suction Hoses, and Hydroboost Units
Power steering coolers are usually a loop of hard steel line in front of the radiator, and in road-salt regions they rust from the outside in. A pinhole there weeps only when the fluid is hot and thin, so it can look intermittent for weeks.
Suction hoses crack and admit air rather than leaking fluid. The symptoms are foamy fluid, a whining pump, and a reservoir that overflows slightly after a drive. Replace the hose and the clamp together, and don't reuse the old clamp.
Hydroboost units, common on heavy-duty diesels and many HD trucks, run the brakes and steering off the same hydraulic pressure from the pump. A leak there can drain the shared reservoir and degrade braking. That's a stop-driving condition, not a monitor-it condition.
Catch It, Then Dispose of It Properly
Put a drain pan under the drip before you start and measure what you catch. The volume over a known number of days gives you a leak rate you can act on. That number is worth more than any visual guess.
Used power steering fluid is hazardous waste. Take it to a household hazardous waste collection point, which most EPA state and local programs publish. Don't pour it down a drain, into soil, or into the trash.
One more thing about the leak map: fluid runs downhill, so the wet spot is almost never the source. Trace the wet trail upward with a light, and clean everything first so the trail has to start fresh. We'll walk through that method properly in the next part, along with the drivability rule that decides whether you fix it this weekend or park it tonight.
Wrong Fluid, Dead Seals: ATF vs. OEM-Spec Power Steering Fluid
Wrong fluid is the quietest cause on this list. It doesn't leak the day you pour it in. It works on the seals for weeks and months, then you get leaks in three places at once and blame the car.
Power steering fluid is a hydraulic oil with a specific additive package. The base stock is mineral or synthetic. The additives handle viscosity, anti-wear protection, anti-foam behavior, and seal conditioning.
Change that chemistry and the rubber inside the system reacts.
Two families matter. Mineral-based fluids and glycol-based fluids, with automatic transmission fluid sitting in the second camp. Seal elastomers are compounded for one family or the other.
Nitrile (Buna-N) and fluoroelastomer (Viton) are the two you'll see most, and both swell or harden when the base chemistry is wrong.
The Specs That Actually Matter
| Specification | Where you'll find it | What to know |
|---|---|---|
| Dexron VI / Dexron III(H) | GM and many Asian and European systems that call for ATF | Red dye, glycol-based, widely used as PSF |
| Mercon V | Ford applications | Not interchangeable with every Ford system |
| Chrysler MS-11655 | Chrysler, Dodge, Jeep, Ram | Specific to their hydraulic steering |
| Honda PSF-S / PSF-II | Honda and Acura | Mineral-based, not ATF, and it matters |
| Pentosin CHF 11S / CHF 202 | BMW, VW/Audi, Volvo, some Ford and Chrysler | Green mineral fluid, CHF 202 for newer systems |
| Ford WSS-M2C204-A2 | Various Ford hydraulic steering units | Often confused with Mercon |
| Toyota PSF | Toyota and Lexus | Some years spec ATF instead, check the cap |
Manufacturer specifications indicate these are not marketing labels. They describe viscosity curves, seal compatibility, and foaming behavior under pressure. A bottle that claims to cover all of them is telling you it covers the average, and your rack doesn't care about the average.
What Happens After You Pour In The Wrong Stuff
The first stage is swelling. Seals absorb the wrong base and grow a few thousandths. That can actually seal a weep for a while, which is why people think it worked.
Then the swelling goes too far. The rubber softens, sheds material, and loses its shape. After that comes hardening and shrinkage as the plasticizers leach out.
That's when the leaks appear, usually at multiple points simultaneously.
That pattern is the giveaway. If your return hose, pump seal, and pinion area all start weeping inside a few months, you don't have four unrelated failures. You have a fluid problem.
Other symptoms stack up alongside it. Cold-morning whine that fades after ten minutes. Foam in the reservoir.
Fluid that turns brown far faster than it should. Steering that feels slightly stiff just off center. Any of those combined with new leaks points at chemistry, not wear.
How To Tell What's In There Now
Color gets you partway. Red usually means ATF or a red-dyed power steering fluid. Amber or gold points to a mineral OEM fill.
Green is a strong hint at Pentosin CHF 11S or 202. Clean and nearly colorless is often a generic parts-store fluid, which tells you nothing useful.
Color can't confirm the spec, though. Two amber fluids can have completely different additive packages. If you don't know the history, the owner's manual is the only authority you should trust here.
If the level is low and you have to add something today, add the fluid that meets the OEM spec. If you're caught out with nothing on hand, a small top-up of the correct-spec product later is far better than guessing at a gas station. Never substitute brake fluid, engine oil, or generic hydraulic oil.
Brake fluid will destroy seals and it strips paint on contact.
Flushing Out A Mistake
If the wrong fluid has been in there a while, one drain and refill isn't enough. A return-line exchange done twice, with a few hundred miles between, works the old fluid out of the rack and cooler.
Skip the pressurized power flush on a high-mileage system. Pushing solvent and pressure through a worn rack can move debris straight into the seals you're trying to protect. Gentle exchanges beat aggressive cleaning on old hydraulic gear.
This is the same discipline that keeps a gearbox alive, and it's worth reading up on routine fluid servicing if you want the mindset. Right fluid, right level, right interval. Nothing exotic.
Stop-Leak in a Bottle: What It Really Does Inside Your Rack
Stop-leak works by swelling seals. That's the whole mechanism, and it's also the reason it can cost you a rack.
Most seal conditioners use esters, glycol ethers, or similar swelling agents. Some older formulas added particulate matter that collects at the leak. Either way, the goal is the same.
Make the rubber expand until it fills the gap.
That works best on a hard, shrunken O-ring in an old system with generous clearances. It works worst on a modern rack with a spool valve that operates on clearances measured in thousandths of an inch.
What It Can Realistically Fix
- A slow weep at an aged pump O-ring on a high-mileage vehicle
- A seeping reservoir seal that's more crust than drip
- A short-term patch on a car you're about to sell or retire
What It Can Damage
- Spool valve orifices. The valve meters fluid through tiny passages. Swollen seal material and thickeners can block them, producing uneven assist or a sticky spot off center.
- Reservoir screens and coolers. Sludge and shed material collect where flow is slow.
- Pump internals. Thickeners raise viscosity, which raises pressure and heat on a pump that's already tired.
- The next repair. A contaminated system makes a reseal job messier and can void a rebuilt rack's warranty.
There's also a diagnostic cost. Pouring stop-leak in before you know where the leak is means you've contaminated a system to fix a problem that might be a forty-dollar hose. That's a bad trade in any currency.
| Situation | Stop-leak verdict |
|---|---|
| Slow weep at an old seal, high-mileage beater, short horizon | Defensible, with eyes open |
| Leak at a hose, clamp, fitting, or crush washer | No. Replace the part |
| Modern rack with tight spool valve tolerances | No |
| Vehicle with a hydroboost unit sharing brake fluid | Never |
| European model running CHF 11S or CHF 202 | No |
| Cooling system or brake system leak misidentified as steering | Absolutely not |
The hydroboost case deserves a hard line. On trucks where the brake and steering systems share hydraulic pressure, a contaminated circuit isn't a steering complaint. It's a braking risk.
Our read on the economics is simple. A bottle costs ten to twenty dollars. A rebuilt rack installed runs several hundred to over a thousand.
If there's any chance the leak is external, spend the twenty minutes finding it instead.
How to Trace a Leak to Its True Source, Not the Puddle
The puddle is a symptom. The source is uphill from it, sometimes by two feet.
Fluid leaves a pressurized system as a mist or a seep, lands on something hot or sloped, and runs. At speed, airflow pushes it rearward. Fan wash spreads it sideways.
By the time it reaches the ground, it has forgotten where it came from.
So you rebuild the trail. That takes a clean surface, a short drive, and about an hour.
What You Need
| Tool | Why it matters |
|---|---|
| Aerosol degreaser and brake cleaner | No clean surface, no diagnosis |
| Nitrile gloves and safety glasses | Hot fluid and solvent spray |
| Bright LED flashlight or headlamp | You're looking for a sheen, not a puddle |
| Flat cardboard | Shows drip position relative to the car's centerline |
| Talc or baby powder | Turns an invisible weep into a visible stain |
| UV dye and a blacklight | Confirms the source in minutes |
| Jack stands or ramps | Never a jack alone |
The Method, Step by Step
- Top up and record the level. Note the mileage. You now have a baseline leak rate.
- Degrease everything. Pump, reservoir, both hoses, rack, subframe, cooler lines. Rinse and dry.
- Slide cardboard underneath overnight. Mark where the drip lands relative to the front axle and the centerline.
- Drive ten to fifteen minutes. Cycle the wheel lock to lock a few times in a car park. Heat and pressure open marginal seals.
- Park on fresh cardboard and wait. A fast leak shows in minutes. A seep takes hours.
- Trace upward with a light. Start at the lowest wet point and follow the film up. Wipe as you go so you can see what's new.
- Dust suspect areas with talc. A weep shows as a dark stain within a short drive.
- Add UV dye if the trail goes cold. Follow the dose on the bottle, usually a small fraction of an ounce. Drive twenty to thirty minutes and inspect with the blacklight.
- Squeeze the rack boots. Fluid means an internal seal, not a boot.
- Check the belt and pulley face. A radial spray pattern means a shaft seal.
Reading the Clues
| What you find | What it means |
|---|---|
| Damp ring around a crimped hose end | Pressure hose ferrule seeping |
| Radial spray on the inner fender or hood liner | Pump shaft seal |
| Wet at the top of the rack near the column | Pinion or input shaft seal |
| Boot full of fluid | Rack end seal failed internally |
| Wet only after a long hot drive | Cooler line pinhole weeping when thin |
| Foamy fluid, no puddle | Suction hose drawing air |
| Level dropping, absolutely nothing wet | Fluid burning off on the exhaust, or an internal leak |
That last row is the one that catches people. A leak that lands on a hot manifold or catalytic converter can evaporate before it ever reaches the ground. You get a smell and a falling level, and no puddle at all.
Two more if/then rules worth carrying. If the wet trail leads to a ferrule or a banjo fitting, replace the crush washers, not just the hose. If the trail leads to a spring clamp that's still tight, the hose underneath has hardened and the clamp is innocent.
Is It Safe to Drive? The Drivability Rule That Decides It
Sometimes yes. Sometimes no. The deciding factors are leak rate, pump noise, and whether fluid is reaching anything hot.
Leak rate is easy to measure and easy to argue about with yourself. Don't argue. Measure.
Top up to the cold mark, record the mileage, and check again after a week of normal driving.
| What you're seeing | Verdict |
|---|---|
| Damp seep, level drops slightly over a month, no noise | Drive it. Book the repair within a couple of weeks. Check the level at every fuel stop |
| Needs topping up weekly, no noise yet | Short local trips only. Fix it this week |
| Needs topping up daily | Park it. The system is losing fluid faster than it can protect itself |
| Whine or groan at idle, heavy steering at parking speed | Don't drive. The pump is running dry |
| Sudden heavy steering, assist comes and goes | Pull over safely. Tow it |
| Fluid spraying or dripping onto the exhaust | Stop. Fire risk |
| Hydroboost truck losing fluid, brake pedal feel changing | Park it. This is a brake problem now |
What Losing Assist Actually Feels Like
At highway speed, it's heavy but controllable. The car still self-centers, the steering ratio is working for you, and you have both hands on the rim. It's the reason some drivers don't notice a failing pump until they reach a junction.
At walking pace, it's a two-hand wrestle. Parking, three-point turns, and tight multi-storey ramps become genuinely difficult. If you're nursing a leak, plan routes that avoid them, and keep your hands placed properly on the rim rather than hooked through the spokes.
Why Driving On A Whining Pump Is A Bad Bet
A pump that's pulling air instead of fluid isn't lubricating its own vanes. The vanes score the cam ring, metal goes into the fluid, and that fluid goes straight through the rack.
Now you're not replacing a seal. You're replacing a pump and flushing a rack, and possibly replacing the rack. The cheapest failure in the system becomes the most expensive one, purely because of a twenty-minute drive.
If You Insist On Driving It To The Shop
- Carry a quart of the correct-spec fluid and check the level at every stop
- Never hold the wheel at full lock. Pressure spikes there and it heats the fluid fast
- Avoid revving at a standstill, which loads a pump that has nothing to pump
- Take the route with the fewest junctions and the fewest slow turns
- Drive with the windows down for the first mile so you can hear the pump change pitch
If the noise gets worse on the way, stop. A pump that's already screaming doesn't recover with more fluid in the reservoir.
What Power Steering Leak Repairs Actually Cost
The spread here is enormous, from a six-dollar clamp to a full rack job, and the diagnosis decides which one you're paying for.
Prices below are typical US independent-shop ranges as of 2026, parts and labor combined. Regional labor rates and rust move these numbers in both directions.
| Repair | Parts | Labor | Typical total, independent |
|---|---|---|---|
| Return hose, clamps, reservoir O-ring | $5 to $60 | 0.5 to 1 hr | $80 to $220 |
| Pressure hose with new crush washers | $60 to $180 | 1 to 2 hrs | $180 to $420 |
| Pump seal kit | $15 to $60 | 2 to 4 hrs | $250 to $550 |
| Pump replacement | $150 to $450 | 2 to 4 hrs | $400 to $850 |
| Cooler line, rust pinhole | $40 to $150 | 1 to 2 hrs | $160 to $380 |
| Rack reseal kit | $60 to $150 | 3 to 5 hrs | $400 to $750 |
| Rebuilt rack installed | $300 to $900 | 3 to 6 hrs | $750 to $1,600 |
| New OEM rack installed | $700 to $1,800 | 3 to 6 hrs | $1,200 to $2,600 |
| Hydroboost unit | $250 to $700 | 3 to 5 hrs | $650 to $1,500 |
The Line Items Nobody Quotes Up Front
- Alignment after rack work. Usually $100 to $200, and skipping it chews tires.
- Steering angle sensor reset. Common on modern cars after a rack swap, and it needs a capable scan tool.
- Rusted fittings that snap. Very common in road-salt states, and it turns a hose job into a line replacement.
- Diagnostic fee. Often $100 to $200, and frequently waived if you authorize the work.
- Fluid and disposal. Small money, but it should appear on the estimate.
Independent Shop, Dealer, Or DIY
Independent shops typically charge $100 to $150 an hour in most metro areas. Dealers run higher, often $150 to $220, and they'll use OEM parts by default. For a return hose or a pressure line, the independent is usually the better value.
DIY makes sense for hoses, clamps, reservoir O-rings, and fluid exchanges. It makes much less sense for a rack swap on a car with a subframe that has to come down, or anything requiring an alignment afterward.
Our advice is to get the diagnosis done professionally if you can't trace the leak yourself. A hundred dollars of diagnosis regularly saves five hundred dollars of guessed parts. Shops see these systems every week and they know the common failure points for your model.
What Ignoring It Costs
A slow weep left alone usually ends in one of two places. A pump that ran dry, or a rack that ingested debris. Both are four-figure repairs on many vehicles, and both started as a hose.
The other cost is resale. A steering rack with a wet boot and a fresh drip under the car is a negotiating tool in a private sale, worth hundreds off the asking price whether the buyer fixes it or not.
Repair Options Compared: Re-Clamp, Reseal Kit, Rebuilt Rack, or New
Once you know where the fluid is coming from, the choice gets narrow fast. There are four realistic paths, and only two of them involve the rack at all.
Start at the cheap end. Most leaks on these systems never need anything more than a hose and a clamp.
Option 1: Replace the Hose, Clamp, or O-Ring
This is the right call when the leak is external and low pressure. A hardened return hose, a spring clamp that lost tension, a weeping reservoir O-ring, or a seeping crush washer on a banjo fitting all fall here.
Parts run from about five to sixty dollars. Labour is under an hour on most cars. If the leak is at a clamp and the hose underneath is still soft and pliable, you can sometimes get away with a new clamp alone.
Best for: anyone with a confirmed external leak and a dry rack. This is the default answer for the majority of weeping fittings.
Option 2: Replace the Pressure Hose
The pressure line is a different job from the return line. It carries the full system pressure, the fittings are often seized, and the banjo bolts use single-use crush washers.
Budget sixty to one hundred eighty dollars in parts and one to two hours of labour. On a rust-belt car, expect at least one fitting to fight you, and sometimes a hard line section to snap.
Best for: a wet ring at the crimped ferrule, or a line that's damp along its length. Don't try to seal a ferrule with tape or a patch. It won't hold at 1,000 psi.
Option 3: Reseal Kit vs. Rebuilt Rack vs. New Rack
This is where the money lives, and where most people get talked into the wrong purchase.
| Option | What it involves | Typical installed cost | Best for |
|---|---|---|---|
| Rack reseal kit | New seals fitted to your existing rack, usually on a bench | $400 to $750 | Solid rack body, failed seals, budget-conscious owner with a good shop |
| Rebuilt rack | A reconditioned unit swapped in, old one returned as a core | $750 to $1,600 | Worn rack teeth, play in the steering, most high-mileage cars |
| New OEM rack | Factory-fresh unit from the dealer | $1,200 to $2,600 | Newer vehicles, warranty work, keeper cars |
| Used rack | Salvage yard unit | $150 to $600 installed | Older vehicles where longevity matters less than cost |
A reseal kit only makes sense if the rack's mechanical parts are still good. If there's play at the pinion, a clunk over bumps, or uneven assist, new seals won't fix any of that. You'll pay twice.
Rebuilt racks are the sweet spot for most drivers. In our research, rebuilt units from a reputable remanufacturer are the standard choice for vehicles past 100,000 miles that are still worth fixing.
New OEM is worth it on a car under warranty or one you plan to keep another decade. Used is a gamble on an old beater, and it's a reasonable one if the donor car was rear-ended rather than worn out.
Best for: match the option to the rack's mechanical condition, not to your budget alone. A cheap rack on a worn housing fails again in a year.
Option 4: Pump Repair Paths
Pumps get the same three-way choice, just cheaper. A seal kit is fifteen to sixty dollars. A remanufactured pump runs one hundred fifty to four hundred.
A new OEM pump is the expensive end.
One rule holds here. If the pump has been whining and the fluid looks like metallic paint, skip the seal kit. The internals are already scored, and a reseal will just leak again from a different spot.
The If/Then That Cuts Through It
- If the leak is at a hose, clamp, or fitting and the rack is dry, replace that part only.
- If a rack boot is full of fluid, the internal seal has failed, so plan for a rack job.
- If the rack has play or a clunk as well as a leak, go rebuilt, not resealed.
- If the pump is noisy and the fluid is glittery, replace the pump and flush the system.
- If the car is over fifteen years old and rusty underneath, weigh the repair against the vehicle's value before you authorize anything.
- If a hydroboost unit is leaking, price it early. It's the one leak here that touches your brakes.
That last point is the one people underestimate. A hydroboost repair is not a steering line item. It's a brake system repair that happens to run off the same pump.
Mistakes That Turn a Cheap Fix Into a Rack Replacement
Most four-figure steering bills started as a forty-dollar problem. These are the moves that get you there.
Pouring Stop-Leak In Before You Know Where The Leak Is
This is the single most expensive mistake on the list. You contaminate a working rack to chase a leak that might be a clamp.
Once swollen seal material and thickeners are circulating, the spool valve can't meter fluid cleanly. You get a sticky spot just off center, uneven assist, and a rack that now needs replacement rather than a hose.
Using The Wrong Fluid Because The Bottle Says Universal
A "fits all" bottle covers the average system. Your rack doesn't care about the average.
Honda and Acura want PSF-S or PSF-II, not ATF. Most BMW, VW/Audi and Volvo hydraulic systems want Pentosin CHF 11S or CHF 202. GM specs Dexron VI in many applications, and Chrysler has its own standard in MS-11655.
Pour glycol-based fluid into a mineral-spec system and the seals swell, soften, then harden. The leaks show up months later at three places at once.
Reusing Crush Washers And Spring Clamps
Banjo bolt crush washers are single-use. They deform to seal, and once they've been compressed they don't do it twice.
Spring clamps are the same story. A clamp that's been sitting on a hardened hose for eight years has lost its tension. Put it back on a new hose and it may not seal.
Use a proper worm-drive or Oetiker clamp instead.
Overfilling The Reservoir
More fluid is not better. Overfill causes foaming, aeration, and overflow out of the cap vent, which looks exactly like a new leak.
Fill to the hot or cold mark on the dipstick, whichever matches the engine temperature. Never above the top mark, hot or cold.
Dry Steering And Holding Full Lock
Turning the wheel with the engine off pushes the rack back and forth with no fluid circulation. It's hard on the seals and it purges lubricant from the teeth.
Holding the wheel against full lock does something different. Pressure spikes hard at the end of travel, and that spike finds every weak seal in the system. Ease off the stop once you feel it.
Skipping The Clean Before The Diagnosis
If you don't degrease first, the old mess and the new leak look identical. You end up replacing parts at random and calling it diagnosis.
Clean, dry, drive, inspect. That sequence costs an hour and saves hundreds.
Forgetting The Alignment After Rack Work
A new rack changes the toe setting. Drive away without an alignment and you'll scrub the inside edge off a pair of front tires within a few thousand miles.
Modern cars also need a steering angle sensor reset, which takes a capable scan tool. Skip it and you get a traction control light and a steering wheel that sits off center going straight.
Ignoring A Wet Boot
A wet boot is not a bad boot. Boots are dust seals. They hold grease in and dirt out, and they were never designed to hold hydraulic pressure.
Fluid in a boot means the rack's internal end seal has failed. Replacing the boot alone is the classic wrong repair, and it comes back within a month.
Mixing Brands And Base Stocks On A Top-Up
Two amber fluids can have completely different additive packages. Topping up a CHF system with a generic amber fluid is the same mistake as pouring in ATF, just quieter.
If you don't know what's in there, don't guess. Add the OEM-spec fluid or don't add anything at all.
Working Under A Jack
This isn't a repair mistake, it's a fatal one. A hydraulic jack is a lifting device, not a support. Use stands or ramps every time, and chock the rear wheels.
Bleeding, Alignment, and the Post-Repair Checks Most People Skip
The repair is the easy half. Getting the air out and verifying the work is where the job actually finishes.
Air in a hydraulic system does two things. It makes the pump scream, and it lets the fluid aerate into foam that doesn't transmit pressure properly. Foam means heavy steering and a pump that's running without lubrication.
How To Bleed The System Properly
- Fill the reservoir to the cold mark. Engine off.
- Raise the front wheels off the ground. Both sides, on stands.
- Turn the wheel lock to lock with the engine off. Twenty to thirty full sweeps, slowly. Stop at each end for a second.
- Check and top up the level. It will have dropped as fluid filled the rack.
- Repeat until the level stops falling and the fluid is free of bubbles.
- Lower the car, start the engine, and let it idle. Turn lock to lock again, slowly, five or six sweeps.
- Check the level hot and top up to the hot mark.
- Shut it off and let it sit ten minutes. Look for foam in the reservoir.
Foam after that routine means air is still getting in. The usual culprits are a loose suction hose clamp or a reservoir O-ring that didn't seat.
Some vehicles with a remote reservoir bleed faster if you raise the front end high and let gravity do some of the work overnight. Others need vacuum bleeding at the reservoir. Check the service information for your model before you assume one method fits all.
What The Alignment Actually Involves
Rack replacement changes the relationship between the steering wheel and the front wheels. Even a careful install leaves the toe off.
An alignment shop sets total toe, thrust angle, and centers the steering wheel. On cars with electronic stability control, the steering angle sensor then needs a zero point calibration through a scan tool.
Budget one hundred to two hundred dollars. It's not optional and it's not a nice-to-have. It's part of the repair.
If you're doing suspension work at the same time, the same rule applies to the front-end joints. Even small decisions about which tie rod ends are worth paying for affect how the alignment holds up over the next few years.
The Post-Repair Checks
| When | What to check |
|---|---|
| Immediately after | Level at hot mark, no drips on the ground, no whine |
| After 20 miles | Level again, look for fresh wetness at every joint you touched |
| After 200 to 500 miles | Level, hose condition at the clamps, boot condition |
| At the next oil change | Full system inspection, fluid color, cap vent |
The twenty-mile check catches most install errors. A crush washer that didn't seat or a clamp that's a turn loose usually shows up within a day.
Torque And Fitting Discipline
Use a torque wrench on banjo bolts and rack mounting bolts. Guessing tight on a hollow banjo bolt cracks it, and overtightening a rack mount distorts the housing.
Replace every crush washer, every O-ring, and every single-use clamp you disturb. Reusing them is the most common cause of a leak that comes back a week later.
Keep brake cleaner away from rubber seals and hoses. It dries them out and accelerates the exact hardening that started the problem. Use a proper degreaser and rinse it off.
Keeping the System Dry: Prevention by Mileage, Climate, and Driving Habit
You can't stop rubber from aging. You can absolutely control how fast it happens.
By Mileage
- Every oil change. Check the reservoir level and look at the return hose and clamps.
- Every 30,000 to 50,000 miles. Exchange the fluid, or follow the owner's manual interval. Fresh fluid keeps seal conditioners working and removes wear particles.
- Around 100,000 miles. Inspect the pressure hose crimps closely. Consider replacing the return hose and clamps before they fail rather than after.
- Past 150,000 miles. Expect pump seals and rack seals to be on borrowed time. Watch for a wet pinion area and a damp boot.
Fluid exchange on these systems is simple. There's usually no drain plug, so you either siphon the reservoir with a turkey baster and refill, repeating over a few days, or disconnect the return line and let the pump push old fluid out while you top up. The second method is faster and more complete.
By Climate
| Climate | What fails first | What to do about it |
|---|---|---|
| Road-salt regions | Cooler and pressure lines rust from the outside in | Rinse the underbody after winter storms, inspect hard lines each spring, treat them before they pit |
| Cold winters | Seals harden and shrink, cold-morning whine | Let the car idle a minute before driving, turn the wheel gently for the first mile |
| Hot climates | Fluid oxidizes and rubber ages fast | Shorten fluid intervals, watch for dark or burnt-smelling fluid |
| Big seasonal swings | Marginal seals weep in winter and seal up in summer | Fix winter weeps in winter. A leak that stops in July is still a leak |
The salt-belt pattern is the most predictable one we see in the data. Steel cooler loops and hard line sections corrode from the outside, and a pinhole only weeps when the fluid is hot and thin. It'll look intermittent for weeks before it becomes obvious.
By Driving Habit
- Don't hold the wheel against the stop. Ease off when you feel it.
- Avoid dry steering with the engine off.
- Don't rev at a standstill with the wheel turned, which loads a pump that's barely moving fluid.
- On long descents and heavy towing, the fluid gets hot. That's normal, but heat is what ages it.
- If you tow or off-road regularly, cut the fluid interval and add a cooler if the vehicle didn't come with one.
The Two-Minute Check That Catches Most Of It
Once a month, park on clean concrete, engine off, and look under the front of the car with a light. Then open the reservoir and check the level and the color.
Clean amber or red at the full mark means you're fine. Dark fluid, a falling level, or a fresh dark patch on the ground means something is starting, and starting is exactly when it's cheap.
If your local inspection rules flag active fluid leaks, which several jurisdictions do, a slow weep can fail a safety test on its own. Fixing it early is cheaper than a failed inspection and a rushed repair.
Frequently Asked Questions
What are the most common power steering fluid leak causes?
Worn return hoses and loose spring clamps cause most leaks. Pressure hose fittings, pump shaft seals, rack end seals, pinion seals and rusted cooler lines account for most of the rest. Wrong-spec fluid and overfilling make all of those worse.
Rack failure is the rarest cause and the most expensive one.
Can you drive with a power steering fluid leak?
Sometimes. A slow seep that needs topping up monthly is usually fine for short trips while you book a repair. A leak that needs fluid weekly is urgent.
Whining, groaning, or heavy steering at parking speed means stop driving. The pump is running dry and damaging itself.
How do you find a power steering leak without a shop?
Degrease the whole system, dry it, and park on cardboard overnight to mark the drip. Then drive fifteen minutes and trace the wet trail upward from the lowest point. Fluid runs downhill, so the puddle is rarely the source.
UV dye and a blacklight confirm a stubborn leak in minutes.
Does power steering stop-leak really work?
It can slow a weep at an aged seal for a while, because it swells rubber. That same swelling can block a rack's spool valve passages and raise system pressure. On a modern rack, or any vehicle with a hydroboost brake circuit, the risk outweighs the benefit.
Find the leak first.
Can the wrong fluid cause leaks months later?
Yes. Seal elastomers are compounded for a specific fluid family. Pour glycol-based fluid into a mineral-spec system, or the reverse, and the seals swell, soften, then harden and shrink.
The result is multiple leaks appearing together, long after the top-up.
Why does my steering still whine after the repair?
Air is still trapped in the system, or the pump was already damaged before the fix. Bleed it again with the front wheels raised, cycling lock to lock until the fluid stops foaming. If the noise remains and the fluid looks metallic, the pump needs replacing, not just resealing.
