
Most drivers start asking when to replace brake rotors at the wrong moment, usually after the pedal starts pulsing or the wheel starts shaking under braking. The real answer doesn't come from the odometer. It comes from a measurement stamped into the rotor itself, plus a handful of visual checks you can do in ten minutes with the wheel off.
Manufacturer specifications indicate that most passenger-car rotors start life somewhere around 22 to 32 mm thick, with a discard limit typically 1.5 to 2 mm below that figure. Once you're at or under that number, no reputable shop will machine the rotor, and no amount of pad life left will save it. So let's read your brakes properly and land on the right call.
When to Replace Brake Rotors
Replace brake rotors when they measure at or below the stamped minimum thickness. Replace them when cracks, deep grooves, or heavy rust pitting cover the friction face. Replace them if pedal pulsation returns after a resurfacing job.
Mileage alone is never the deciding factor. Measure first, then decide.
The Two Numbers That Actually Condemn a Rotor
Every rotor carries its own verdict, cast or stamped into the metal before it ever left the factory. One number is the manufacturer's minimum thickness spec. The other is what your micrometer reads off the actual friction face.
The spec usually appears as MIN TH, THK, or a bare number followed by mm, stamped on the hat face or on the outer edge near the cooling vanes. On some rotors it's buried under rust and brake dust, so bring a wire brush and a light. If you can't find it, the same figure lives in the vehicle service manual and in most OEM parts catalogs.
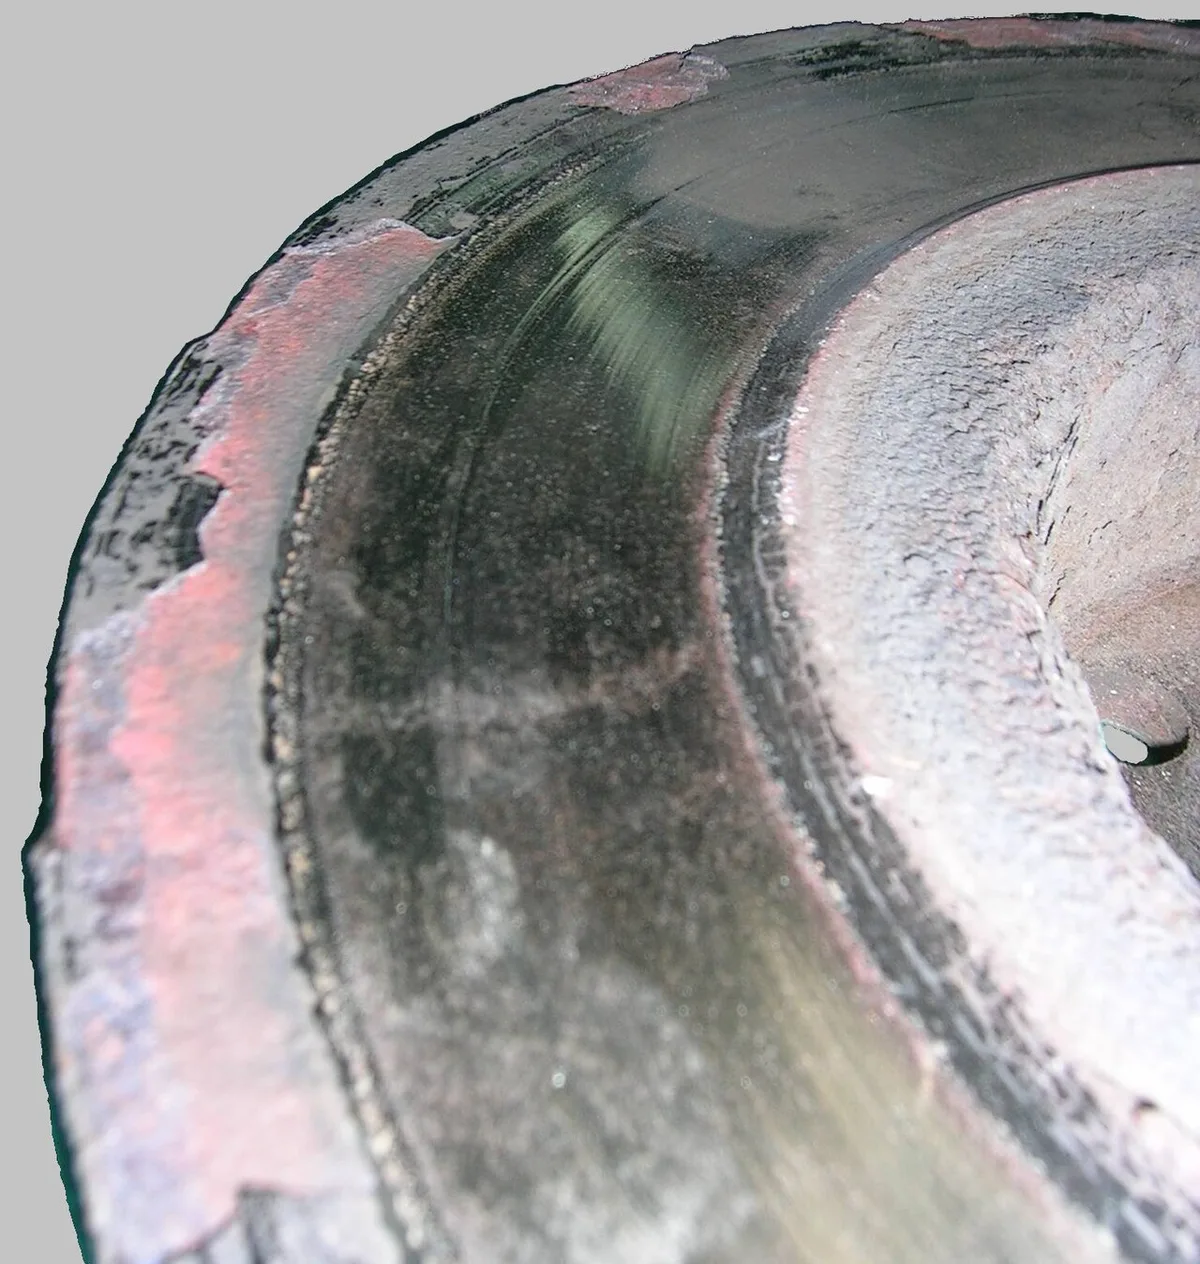
Image source: Wikimedia Commons / Maly LOLek (CC BY-SA)
Here's the if/then logic that matters. If your measured thickness sits comfortably above the stamped minimum, the rotor has life left and you can look at pad wear and surface condition instead. If it's within a few tenths of a millimeter of the minimum, plan replacement at the next pad change, because machining it would push it under spec.
If it's at or below the minimum, it's condemned, full stop.
Why so strict? Thermal mass. A rotor is a heat sink, and every bit of thickness is metal that absorbs and sheds the heat of a stop.
Machine a rotor down near its limit and you've removed capacity the engineers counted on. That's how you get fade on a long descent and cracks that start at the drilled holes or vane openings.
| Vehicle class | Typical new thickness | Typical discard spec | Typical runout limit |
|---|---|---|---|
| Compact sedan / hatchback | 22 to 24 mm | 20 to 22 mm | 0.05 mm (0.002 in) |
| Mid-size sedan / crossover | 26 to 28 mm | 24 to 26 mm | 0.05 to 0.08 mm |
| Half-ton truck / large SUV | 30 to 34 mm | 28 to 31 mm | 0.08 mm (0.003 in) |
| Performance / track-oriented | 30 to 32 mm | 28 to 30 mm | 0.03 to 0.05 mm |
| Solid rear rotor (many cars) | 9 to 12 mm | 7 to 10 mm | 0.05 to 0.08 mm |
Those are ranges across common platforms, not a substitute for your own spec. Always read the stamp or the manual for your exact vehicle. A difference of 1 mm in the limit changes the whole decision.
One wrinkle worth knowing as of 2026. A large share of aftermarket rotors now ship with a zinc-rich or similar anti-corrosion coating, and that coating can hide the stamping. The coating burns off the friction face within the first few stops, which is completely normal.
It does not mean the rotor is failing.
Reading Your Rotor: Thickness, Runout, and Disc Thickness Variation
Three measurements decide this, and they answer three different questions. Thickness tells you how much material is left. Disc thickness variation (DTV) tells you whether the two faces are still parallel.
Lateral runout tells you whether the rotor is spinning true on the hub.
You don't need a full shop to check the first one. A micrometer with the right range and a clean friction face will do it. Runout and DTV checks are where a dial indicator earns its keep, but plenty of DIYers confirm a suspicion with a micrometer alone and then hand the car to a shop for the rest.
| Tool | What it measures | Why it matters |
|---|---|---|
| Outside micrometer (0 to 1 in or 0 to 25 mm) | Rotor thickness | Compares directly to the stamped minimum |
| Dial indicator with magnetic base | Lateral runout | Catches a rotor that wobbles on the hub |
| Digital caliper | Rough thickness only | Fast sanity check, not a precision verdict |
| Torque wrench | Lug nut clamp load | Prevents the runout you'd otherwise create |
| Brake cleaner and wire brush | Surface prep | Cleans the face before you measure it |
Measure thickness at eight points around the face, roughly 45 degrees apart, and about 10 mm in from the outer edge. Wipe the face clean first, because a layer of rust or pad material will lie to you. Write the numbers down.
The lowest reading is the one that counts.
Then compare the readings against each other. That spread is your DTV, and it's the number behind most pulsation complaints. Research in brake engineering puts the point where drivers start feeling a shudder at roughly 10 to 15 microns of variation between measurement points, though sensitivity varies by vehicle and pad compound.
Runout is the third check, and it's the one most DIYers skip. Mount the dial indicator so the stylus rides on the friction face about 10 mm in from the edge, then rotate the hub a full turn. If the needle swings past the vehicle's limit, usually 0.05 to 0.08 mm, something is off.
It might be the rotor. It might also be rust or debris trapped between the rotor and the hub face.
That last point is where a lot of brake jobs go wrong. A few thousandths of an inch of rust scale on the hub mounting face will tilt the rotor and produce runout no new part can fix. Clean that face with a Roloc disc or a wire brush until it's bright, then remeasure.
It costs you five minutes and saves you a comeback.
Lug nut torque belongs in this conversation too. Uneven or excessive clamp load distorts the rotor hat and shows up later as DTV. If your last tire rotation ended with impact gun habits, that's a plausible cause of the shake you're feeling now.
A torque wrench and a proper star pattern are not optional.
The Six Visual Warning Signs That Mean Replace, Not Resurface
Numbers settle the argument, but your eyes usually get there first. Pull the wheel, get a light on the rotor, and look for these six things. Any one of them can move the verdict from resurface to replace.
- Heat checking and surface cracks. Fine hairline cracks radiating outward from the face or starting at drilled holes. Light crazing on a hard-used rotor is common, but cracks you can catch a fingernail in mean the casting is done.
- Deep scoring or grooves. A scored rotor has raised metal edges on the grooves. If you can feel them with a fingernail, the rotor has been running metal on metal and has likely lost thickness fast.
- Hard spots and blueing. Blue or dark patches signal localized overheating. Those spots have different friction characteristics than the surrounding metal, and they'll chatter no matter how many pads you throw at them.
- A pronounced rust lip. A thin ridge at the outer edge is normal. A lip deep enough to catch a fingernail means the pads have worn a step into the face, and new pads won't sit flat on it.
- Corrosion pitting across the friction face. Common on cars that sit, on EVs, and in salt-belt winters. Surface flash rust wipes off. Pitting that eats into the metal does not.
- Edge chipping or delamination. Chunks missing from the outer edge, or a friction ring separating from the hat area on a two-piece rotor. Stop driving and replace.
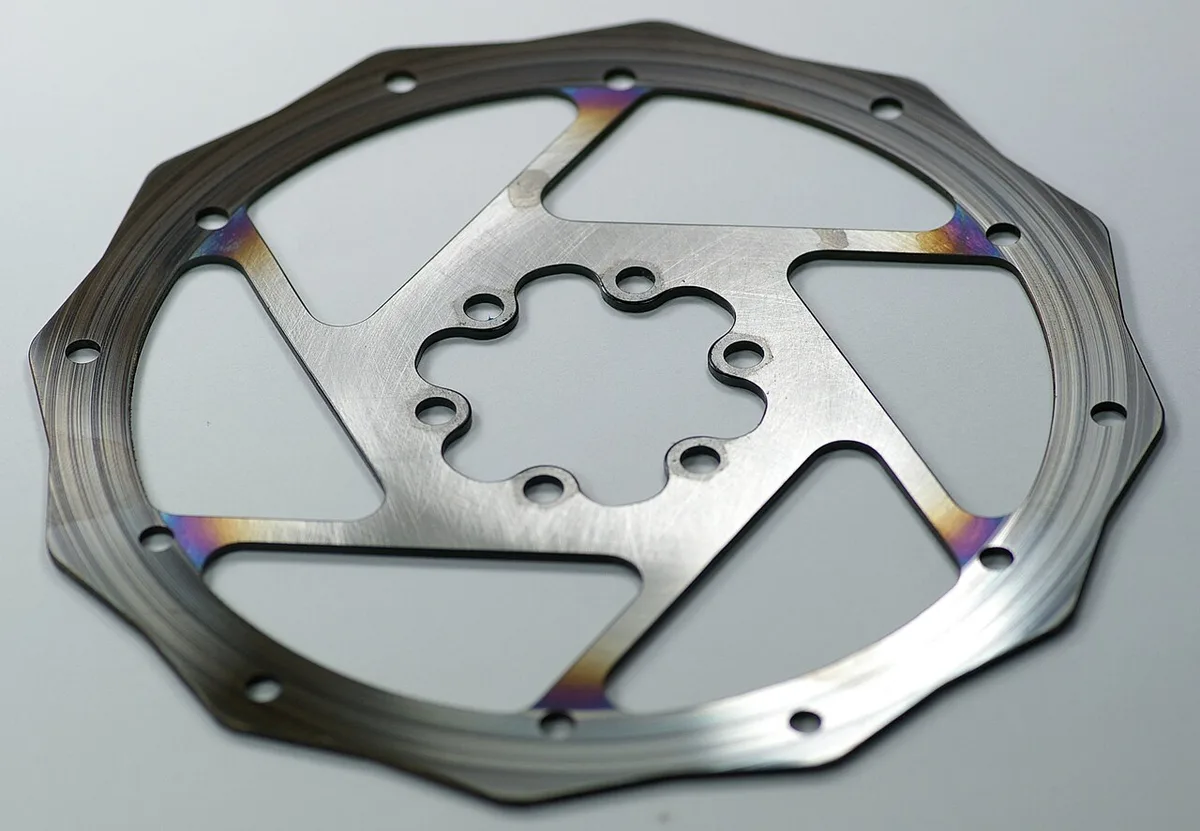
Image source: Wikimedia Commons / Hustvedt (CC BY-SA)
Some of these checks are far easier with the car raised a little. Wooden ramps you build yourself make this inspection much easier than lying on your back in a driveway, and they're stable enough to work around safely.
If you find one of the first three signs and the rotor is already near minimum, the decision is made for you. If the rotor is thick, smooth, and crack-free but the pads are gone, you're in the resurface-or-replace debate instead. That's a different conversation, and the pricing usually settles it.
Pulsation, Shake, and Grinding: Matching the Symptom to the Cause
Symptoms are a shortcut to the diagnosis, as long as you read them correctly. The same shake can come from a rotor, a hub, a tire, or a suspension joint. Here's how the common complaints usually sort out.
| What you feel or hear | Most likely cause | First move |
|---|---|---|
| Pedal pulses under braking, worse when hot | Disc thickness variation or uneven pad transfer | Measure thickness and DTV |
| Steering wheel shakes only while braking | Front rotor runout or DTV | Check runout with a dial indicator |
| Whole car vibrates while braking | Rear rotors, or a tire/wheel issue | Rule out tire balance first |
| Grinding or metal-on-metal scrape | Pads worn to backing plates | Stop driving, inspect immediately |
| Squeal that stops when you brake | Pad wear indicator or glazed pads | Check pad thickness |
| Pulsation returns weeks after machining | Rotor machined too thin, or hub rust | Replace the rotor, clean the hub face |
The pattern matters more than the intensity. A shake that only appears under braking points at the brakes. A shake that shows up at a steady 65 mph and fades when you slow down points at tires or wheels.
If you can feel it through the seat more than the pedal, look rearward.
It's the shake that reaches your hands, and no change in hand position on the wheel will quiet it. That's diagnostic gold, because it tells you the vibration is being fed into the steering system rather than coming from the road surface.
Grinding is the one symptom that overrides everything else. If you hear metal grinding when you brake, the pad friction material is gone and the backing plate is cutting into the rotor. Every mile you drive like that adds damage and cost.
Park it and deal with it.
Why Warped Rotors Is Usually the Wrong Diagnosis
Almost everyone calls it a warped rotor. Most of the time, it isn't warped at all. Actual permanent warping of a cast iron rotor takes extraordinary heat, and it's rare on a street car.
What usually happens is uneven pad transfer. Pad material bonds to the rotor face in patches, creating high and low friction zones. Those zones grab harder, generate more heat, and the cycle deepens.
The pedal pulses, the wheel shakes, and the rotor looks warped even though the casting is straight.
The second common cause is runout introduced at the hub. Rust scale, debris, or a burr between the rotor and hub face tilts the disc. So does uneven lug nut torque.
Over time, that wobble scrubs the pads and builds the thickness variation that produces the shake.
Why does the distinction matter? Because it changes the fix. If you resurface a rotor with uneven deposits and then reinstall it on a dirty hub with over-torqued nuts, the pulsation comes back, and you'll blame the parts.
The real answer is a clean hub, verified runout, correct clamp load, and a proper bed-in.
Worn front-end parts can also produce a shimmy that masquerades as a brake problem, so it's worth ruling them out before you spend money on rotors. And on the legal side, the performance bar your brakes have to meet in the US is set by FMVSS 135, the federal standard for passenger car braking systems. SAE International publishes the test standards the industry uses to validate rotor and pad behavior.
Neither one cares what you call the vibration, only that the system stops the car.
Replace vs Resurface: The Branch Most Drivers Get Wrong
Resurfacing means machining both faces of the rotor on a brake lathe to restore flatness and parallelism. It removes metal. That's the whole trade: you gain a smooth, true surface and you lose thickness you can never put back.
The branch point is headroom. If the rotor still carries plenty of material above its stamped minimum, machining is a legitimate option. If it doesn't, the lathe can't rescue it, no matter how good the surface looks.
| Situation | Verdict | Why |
|---|---|---|
| Well above minimum, smooth, no cracks, pulsation present | Resurface is viable | Restores parallelism and removes deposit buildup |
| Within 0.5 mm of the stamped minimum | Replace | A cut pushes it under spec |
| At or below minimum | Replace | Not legally or safely machinable |
| Visible cracks, hard spots, or deep scoring | Replace | Machining won't remove a metallurgical problem |
| Rotor is fairly new and pulsating from pad deposits | Resurface or re-bed | Thickness isn't the issue, transfer layer is |
| Coated rotor with light surface rust only | Neither | Clean it and keep driving |
Cost rarely decides this the way people expect. In our research, machining runs roughly $10 to $40 per rotor while a replacement economy or mid-grade rotor lands around $30 to $150 depending on vehicle and grade. Labor to strip and refit the corner is the same either way.
So you're often comparing $40 to $80 against a total bill of $300 to $600 or more. That gap is small, and replacement removes the risk of a comeback. This is why most shops now default to new rotors.
When resurfacing still makes sense
Resurfacing earns its place in a few narrow cases. A thick OEM truck rotor with plenty of service allowance and a light pulsation is a good candidate. So is a rotor you know is recent, where the problem is pad transfer rather than wear.
It also makes sense if you're keeping a numbers-matching classic or a rare performance rotor that's expensive or hard to source. And it works if the shop uses an on-car lathe, which cuts the rotor true to the hub rather than true to a bench arbor.
That last distinction matters. An on-car lathe compensates for hub runout that a bench lathe can't see. If a shop is going to machine your rotors, ask which machine they're using.
When resurfacing is a waste of money
Skip it if the rotor is near minimum, if it has cracks, or if a rust lip has already worn a step into the face. Skip it if the friction ring is separating from the hat on a two-piece rotor.
Skip it if a previous shop machined the rotor and the pulsation came back within a few thousand miles. That's a rotor telling you it has no thermal mass left. Cutting it again just delays the replacement by a month.
One more thing to check before you commit to machining. Some rotors are stamped with a do-not-machine notice, and some coated rotors shouldn't be turned because the coating is part of the corrosion strategy. Read the stamp.
The Rotor That Can't Be Machined: Why Modern Rotors Are Born Near Minimum
Here's the part that surprises people. A brand-new rotor often has only about 2 mm of total service allowance before it hits the discard spec. That's it.
Two millimeters spread across two faces.
Automakers cast rotors thin on purpose. Less iron means less unsprung weight, better ride quality, and lower cost per unit. The penalty lands on you at the first brake job.
Run the arithmetic. A typical cut removes 0.2 to 0.4 mm per side, so a light pass takes 0.4 to 0.8 mm off the total thickness. Do that once on a rotor with 2 mm of headroom and you've burned a quarter to nearly half your margin.
| Rotor example | New thickness | Typical discard spec | Total headroom | After one 0.4 mm cut per side |
|---|---|---|---|---|
| Compact sedan front | 24.0 mm | 22.0 mm | 2.0 mm | About 22.4 mm, almost done |
| Mid-size crossover front | 28.0 mm | 26.0 mm | 2.0 mm | About 26.4 mm, one pass left at most |
| Half-ton truck front | 32.0 mm | 30.0 mm | 2.0 mm | About 30.4 mm, tight |
| Solid rear rotor | 10.0 mm | 8.0 mm | 2.0 mm | About 8.4 mm, essentially spent |
Those figures are illustrative ranges, not your spec. Read the stamp on your own rotor or the service manual for your exact model. A 0.5 mm difference in the limit flips the decision.
This is why the second brake job almost never includes machining. By the time pads wear out again, the rotor is at or near minimum, and there's nothing left to cut. Replacement isn't a shop upsell in that scenario.
It's the only legal option.
What happens when a shop machines past the limit
A rotor turned below its minimum thickness loses thermal mass, and that's the capacity engineers used to control heat. Thin rotors run hotter, warp more readily, and crack sooner. On a long downhill grade, that shows up as fade right when you need the brakes most.
Reputable shops won't do it, and it's not just caution. Brake work sits inside a federal performance envelope set by FMVSS 135, and a below-spec rotor is a liability a licensed shop has no reason to accept. If someone offers to turn a rotor you've measured at the limit, walk away.
There's a money angle too. A machined-too-thin rotor will often pulse again within a few thousand miles, and now you've paid for machining and replacement. That's the most expensive path in this whole article.
Not every rotor is machinable in the first place
Some rotors are designed as fit-and-forget parts. Two-piece and floating designs, many performance rotors, and most carbon-ceramic units fall outside normal machining practice. Drilled rotors can also chip at the holes when cut.
Coated rotors add another wrinkle. The zinc or similar coating protects the non-friction surfaces from corrosion, and turning the faces removes it from the areas that matter least. The face itself gets bare either way once pads bed in, so coating loss on the face is normal.
What you should not do is assume every rotor is a candidate for a light cut. Ask the question before the wheel comes off. It saves you a second trip.
Pads-Only on Old Rotors: When It Works and When It Bites You
Pads-only is a real, defensible repair in the right conditions. It's also the single most common source of "my brakes still feel wrong" complaints. The difference comes down to the rotor surface the new pads have to live with.
New pads need three things from a rotor: flatness, parallelism, and a surface the friction material can bed into. If the rotor gives you all three, fresh pads will seat properly. If it doesn't, the pads wear into a shape that matches a bad surface.
That's why the if/then test matters more than the price of the parts.
- If the rotor is comfortably above minimum, smooth to the touch, and free of cracks or a raised lip, pads-only is fine.
- If the rotor has a lip you can catch a fingernail on, replace the rotors or at least machine them if there's headroom.
- If the rotor is scored with raised metal edges, replace. New pads will groove themselves to match.
- If the rotor shows blue patches or hard spots, replace. Those zones grab differently and will chatter.
- If the rotor is at or near the discard spec, replace. Pads on a spent rotor just accelerate the end.
Rear brakes are the common exception. Many cars wear rear pads far more slowly than fronts, and rear rotors often stay within spec through one pad cycle. If the rear rotor measures clean and thick, pads-only is a sensible call.
The mixed pad and rotor problem
Pad compound matters here. Ceramic pads tend to deposit a thinner, more even transfer layer on a smooth rotor. Semi-metallic pads are more abrasive and will clean up a lightly glazed surface as they bed in.
Put aggressive semi-metallic pads on a rotor with an uneven transfer layer, though, and you get uneven cleaning, uneven heat, and eventually the pulsation you were trying to avoid. Match the pad to the rotor condition, not just to the marketing description.
Aggregate user reviews also flag a quieter issue. Some pad manufacturers require rotor resurfacing or replacement as a condition of their pad warranty. Skip it and you may have voided coverage before the first stop.
What bedding actually does
Bedding transfers a thin, uniform layer of pad material onto the rotor face. That layer is what your pads actually grip. It's why a freshly bedded brake setup feels sharper.
On a worn rotor, the layer can't form evenly. High spots grab first, generate more heat, and build deposits faster. You end up with the same pulsation pattern the old pads had, plus a set of half-worn new pads.
The practical rule: cheap pads on good rotors beats good pads on bad rotors every time. If your budget is tight, buy rotors you can trust and pads that meet the spec. Don't invert it.
Always in Pairs: The Axle-Matching Rule and What Happens If You Skip It
Replace rotors in axle pairs. Both fronts together, or both rears together. Never one corner at a time on a street car.
The math is simple. A new rotor and a worn rotor on the same axle have different thickness, different thermal mass, and different friction behavior. Braking force won't split evenly, and the car will pull toward the side doing more work.
That pull is mild at first and easy to dismiss. Under a hard stop from highway speed it stops being mild. Add a wet road or a panic situation and you've built an asymmetry into the one system designed to keep the car straight.
ABS and stability control make this worse, not better. Those systems read wheel speed and correct for slip. An axle with mismatched rotors gives them conflicting signals to work with, and the correction can feel vague or grabby.
Where pairs end and full sets begin
Pairs means per axle, not all four corners. You can replace the fronts now and leave the rears if they measure in spec and the pads have life left. That's normal practice and it spreads the cost.
The exception is when both axles are at the same stage. If the car is past 80,000 miles on original rotors at both ends, doing all four in one visit is usually cheaper than paying twice for lift time.
Remember that the axle rule also applies to the pad-and-rotor combination. Mixing a fresh rotor with a half-worn pad on the opposite side is the same mistake in different clothing. Keep the friction pairing balanced side to side.
Torque is part of the pairing job
Uneven clamp load from the lug nuts distorts the rotor hat and creates runout. That runout scrubs the pads and builds thickness variation, which is the front half of this article repeating itself six months later.
Tighten in a star pattern to the manufacturer's torque spec, in stages. If you've been leaning on an impact gun, a gentler tightening routine will save you more in rotors than it costs in time. And if your current hardware is tired or rounded, it's worth knowing the going rate for new hardware before you start.
Fresh lug nuts are cheap insurance on a brake job. Stretched or corroded nuts won't hold a consistent clamp load, no matter how careful you are with the wrench.
If the car still pulls after the job
A pull that survives new rotors and pads on both sides usually isn't a brake problem. Look at tire pressures, then at alignment, then at the front-end joints. Worn steering components can mimic a dragging caliper closely enough to fool you.
That's the point where spending more on the steering joints starts to make sense. A seized caliper slide pin is the other usual suspect, and it's a five-minute check with the wheel off.
If a warning light is on alongside the vibration, pulling the codes yourself before you visit a shop will tell you whether a wheel speed sensor is involved. That single step often separates a $40 fix from a $400 one.
Mileage, Climate, and Driving Style: What Actually Shortens Rotor Life
You'll see the 30,000 to 70,000 mile figure quoted everywhere for rotor life. Treat it as a very rough population average, not a schedule. Plenty of rotors are done at 40,000 miles and plenty are still in spec at 90,000.
What actually drives wear is heat cycles, pad abrasiveness, and corrosion. Mileage is just the container those three live in.
| Factor | Effect on rotor life | What to do about it |
|---|---|---|
| Heavy vehicle, small rotors | Shorter | Expect earlier replacement, inspect at every pad change |
| Towing and hauling | Shorter | Check thickness before long trips, not after |
| Mountain descents, engine braking ignored | Much shorter | Use lower gears, let the brakes cool between corners |
| Stop-and-go city and rideshare duty | Shorter | More heat cycles per mile than highway driving |
| Steady highway commuting | Longer | Brakes get long cooling intervals |
| Road salt and winter brine | Much shorter | Clean the rotor faces each spring, watch for pitting |
| Coastal humidity and cars that sit | Shorter | Surface rust between uses, EV rust rings included |
| Aggressive semi-metallic pads | Shorter | Consider ceramic if the car allows it |
| EV regenerative braking | Mixed | Pads last longer, rotors rust from disuse |
Climate is the underrated one. In salt-belt regions across the northern US, Canada, and the UK, rotors corrode from the inside out and the outer edge. A car that does 8,000 winter miles can lose more rotor to corrosion than a warm-climate car loses to friction in 30,000.
EVs flip the wear pattern. Regenerative braking handles most deceleration, so pads and rotors see little friction work. The result is a rotor that rusts and pits from sitting between uses, especially at the rear.
It's a different failure mode, not a longer lifespan.
Driving style closes the loop. A driver who brakes early and lightly builds fewer heat cycles than one who brakes late and hard. Two identical cars on the same commute can differ by 30,000 miles of rotor life on that alone.
So don't schedule rotor replacement by odometer. Schedule it by measurement. Check thickness at every pad change, and check it once a year if you live where the roads get salted.
EV Brakes, Rust Ridges, and the Underused Rotor Problem
Electric cars have quietly rewritten the rotor wear story. Regenerative braking handles most of the slowing, so the friction brakes sit idle for weeks at a time. The rotors don't wear out.
They corrode.
A rotor that never gets hot never fully dries. Moisture sits on the face overnight, flash rust forms, and the next damp morning adds another layer. Repeat that through a winter and you get pitting that no amount of driving will scrub away.
Weight makes it worse in a different way. EVs carry several hundred pounds more than their gas equivalents, so when the friction brakes do engage, they work harder than the same size rotor on a lighter car. Fewer stops, but hotter ones.
The rear axle takes the biggest hit. Blended braking already sends less work rearward, and one-pedal driving means the rear friction brakes may not engage for days. Rear rotors, calipers, and slide pins all suffer from that neglect.
What an underused rotor actually looks like
Picture a friction face with a bright, polished band in the middle and a dark, crusty ring around the outer edge. The polished band is where the pads occasionally touch. The crusty ring is where they never do.
That outer ring is the rust ridge, and it's a corrosion feature, not a wear feature. It builds on the area pads can't reach, then creeps inward as the car sits. Left long enough, it starts lifting the pad edge and causing drag.
The failure chain is predictable. Rust builds on the unswept edge. The pad rides that ridge and never makes full contact.
Stopping power drops, the pad wears unevenly, and the rotor face develops a groove pattern that mirrors the ridge.
Rust jacking, the failure nobody warns you about
There's a second corrosion problem worth knowing. Pad backing plates are stamped steel, and they rust too. When corrosion builds between the backing plate and the friction material, it expands and pushes the pad outward.
That's rust jacking. The pad starts dragging, the rotor overheats in one band, and you get a vibration that feels exactly like a warped rotor. No amount of machining fixes it because the cause sits in the pad, not the disc.
If you find a seized or partially delaminated pad on an EV or a car that sits a lot, replace the pads and inspect the rotor face closely. Any rotor with pitting deeper than a light surface etch is finished.
| What you see on the rotor | Verdict | Reason |
|---|---|---|
| Even light flash rust after rain | Keep driving | Clears within a few stops |
| Dark ring on the unswept outer edge, no pitting | Inspect and clean | Early ridge, still usable |
| Pitting you can feel with a fingernail | Replace | Metal is gone, thickness is compromised |
| Rust flakes lifting under the pad edge | Replace | Pad contact is already compromised |
| Pads bonded to the face after storage | Replace pads, inspect rotor | Bonding usually pulls friction material |
The fix is a deliberate brake workout
You can head this off. Once a month, find an empty stretch of road and make six or eight firm stops from around 50 mph down to 10 mph, with cooling gaps between them. That burns the rust off and re-beds the transfer layer.
Don't come to a complete stop during those runs. Holding a hot pad against a hot rotor stamps pad material into one spot, and that's how you create the deposit patch that starts pulsation.
If your car has a low-regen or "coast" mode, use it occasionally on your normal commute. Ten minutes of ordinary friction braking once a week does more for rotor health than any additive or spray.
Coated rotors help here. A zinc-rich coating on the hat and the unswept edge slows the corrosion that starts the whole chain, which is why several manufacturers now fit them as original equipment on EVs and hybrids.
What a Brake Job Really Costs: Rotors, Labor, and Resurfacing
The parts are usually the smaller half of the bill. Labor is what moves the number, and it moves a lot depending on where you live and who does the work.
Here's where the money goes on a typical front axle job, based on current aftermarket pricing as of 2026.
| Line item | Typical range | Notes |
|---|---|---|
| Rotors, pair | $60 to $300 | Economy to premium, per corner at $30 to $150 |
| Pads, axle set | $40 to $150 | Ceramic usually sits at the top of that band |
| Labor, 1 to 2 hours | $100 to $300 | Shop rate commonly $90 to $180 per hour |
| Hardware and shim kit | $10 to $30 | Often skipped, never a good skip |
| Brake fluid flush | $80 to $120 | Whole car, recommended every 2 to 3 years |
| Caliper, if seized | $90 to $250 each | Plus core charge in some cases |
Add it up and a front axle job lands somewhere between $250 and $650 at an independent shop. A dealership typically runs $400 to $900 for the same work, and trucks, EVs, and performance models push past that.
Machining changes the math less than people expect. At roughly $10 to $40 per rotor for a bench cut, you're saving maybe $60 to $200 against new parts. On a $500 bill, that's not a decision worth agonizing over.
DIY versus shop: the honest comparison
Doing it yourself cuts the bill to parts only, plus whatever tools you're missing. That sounds like a huge win until you price a torque wrench, a micrometer, and a decent jack and stands.
| Route | Typical front-axle cost | Best for |
|---|---|---|
| DIY | $120 to $350 in parts | Confident owners with tools and a flat, safe workspace |
| Independent shop | $250 to $650 | Most drivers, especially with ABS or electronic parking brakes |
| Dealership | $400 to $900 | Warranty work, newer vehicles, hard-to-source parts |
Two things push a job into shop territory. The first is an electronic parking brake, which usually needs a scan tool in service mode before the rear caliper will retract. The second is a seized caliper or rounded bleeder, which turns a two-hour job into an afternoon.
The small costs that add up
Lug hardware is a good example. Stretched or corroded nuts won't hold consistent clamp load, and replacing them is cheap compared to the runout they cause. It helps to know what fresh lug hardware costs before you decide to reuse tired ones.
Brake fluid is the other quiet line item. It's hygroscopic, meaning it absorbs moisture from the air, and wet fluid boils at a much lower temperature. A boiled fluid pocket gives you a spongy pedal on a long descent, which is the worst possible time to find out.
Skip the flush for five years and you'll pay for it in a caliper or an ABS module eventually. Those are $300 to $1,200 parts, not $100 services.
Where cheap rotors cost you twice
Budget rotors can work fine on a light commuter car. On a heavier vehicle or one that tows, poor metallurgy shows up as heat cracking, judder, and a repeat job inside 20,000 miles.
Look for a coating, a known brand, and a spec sheet that lists the minimum thickness. If a listing doesn't tell you the discard spec, that's a signal about how carefully the part was made.
Mistakes That Cause Repeat Failures: Torque, Hub Rust, and Bad Bedding
Most brake comebacks aren't caused by bad parts. They're caused by something small that got skipped during install. Here are the ones that show up over and over.
The hub face nobody cleans
Rust scale between the rotor and the hub flange tilts the disc by a few thousandths of an inch. That's enough to produce measurable runout and a shake that returns within 2,000 miles. Clean the flange to bare metal with a Roloc disc or wire brush before anything goes back on.
Check runout after installation, not just before. If the needle swings past spec on a brand-new rotor, the problem is under it, not in it.
Clamp load by impact gun
Overtightening distorts the rotor hat and creates the thickness variation that starts all of this. If you have an impact gun habit, break it. Spin the nuts on by hand, then finish with a torque wrench in a star pattern, in two or three stages.
Recheck torque after 50 to 100 miles. New hardware settles, and a nut that was correct on day one can be loose by week two.
Skipping the brake cleaner step
New rotors ship with an anti-corrosion oil film. Pads can't bed through it. Spray the friction faces with brake cleaner and wipe them until the cloth comes away clean, or you'll be chasing a pull or a squeal from the first mile.
Don't spray cleaner on the bearing surfaces or into the ABS sensor area. Keep it on the friction face and the hat.
Grease in the wrong places
Slide pins need high-temperature silicone grease, not ordinary chassis grease and definitely not copper anti-seize. Petroleum-based grease swells the pin boots and turns gummy, which causes drag and uneven pad wear.
Never put anything on the friction face. Not grease, not anti-squeal compound, not sandpaper residue. The face should be clean and dry.
Bedding that never happened
Bedding transfers pad material evenly across the rotor. Skip it and the pads deposit unevenly on their own, which is the deposit patch that reads as pulsation later.
Here's the sequence that works for most street setups.
- Find an empty road with room to stop from 50 mph.
- Make six to eight moderate stops from 50 down to 10 mph, about 30 seconds apart.
- Then make two or three harder stops from 60 down to 15 mph.
- Drive for 10 to 15 minutes without heavy braking to let everything cool.
- Avoid holding the pedal down at a standstill while the brakes are hot.
You'll smell hot brakes during the hard stops. That's normal. Smoke or a spongy pedal is not, so stop and let things cool.
Reusing one-time hardware
Some caliper bracket bolts are torque-to-yield, meaning they stretch on installation and shouldn't go back in. Others carry thread-locking compound that's already been used once. Follow the service manual.
A $4 bolt isn't worth a caliper on the highway.
While you're under there, look at the front-end joints. A worn tie rod end produces a shimmy that mimics a brake vibration, and spending more on front-end joints makes sense before you buy a second set of rotors chasing a noise that isn't brake-related.
Forgetting the parking brake service mode
Rear calipers with an electronic parking brake need the piston retracted electronically. Forcing it back with a C-clamp can destroy the actuator. Put the car in service mode first, and confirm the mode cleared before you drive away.
When to Stop Driving and Get It Checked Today
Most brake issues give you weeks of warning. A few don't, and those are the ones where the right answer is to park the car. Here's the split.
| Symptom | Urgency | What it usually means |
|---|---|---|
| Light squeal or squeak | Book it in | Wear indicator touching the rotor |
| Pedal pulsation or steering shake | Inspect this week | Thickness variation or runout |
| Grinding metal on metal | Stop driving | Friction material gone, backing plate cutting the rotor |
| Pedal sinks or feels long | Stop driving | Fluid leak or a failing master cylinder |
| Car pulls hard to one side under braking | Stop driving | Seized caliper or a collapsed hose |
| Burning smell plus a hot wheel | Stop driving | Dragging brake, fire risk |
| Red brake warning light | Stop driving | Hydraulic fault or low fluid |
Grinding is the one people push too far. Every mile on a metal-to-metal pad grinds the rotor down and can overheat the caliper. What would have been a $300 job becomes a $700 one with calipers and hoses.
A pedal that sinks toward the floor while you hold it at a light is a hydraulic failure in progress. Don't test it on the highway. Stop somewhere safe and get it towed.
What to do when the brakes feel wrong on the road
Ease off the accelerator and let engine braking do the work. Downshift if you can. Stay off the pedal unless you have to slow quickly, because a dragging or overheated brake gets worse with heat.
Pull as far off the road as you can and put the hazards on. If a tow is needed, know where a tow strap attaches on your vehicle before anyone hooks up, so nothing gets pulled from the wrong place.
If a warning light came on alongside the vibration, picking the right code reader lets you see whether a wheel speed sensor is involved before you pay for a diagnostic. That one step often separates a sensor replacement from a full ABS repair.
What an inspection should cost
A brake inspection typically runs $0 to $100, and many shops waive it if you book the repair with them. Ask them to write down your measured rotor thickness and the stamped minimum. That gives you a number to compare against next year.
In the UK, the annual MOT test includes a brake efficiency check, and corroded or excessively worn discs are a common failure point. In US states with safety inspections, rotor condition gets checked on the same basis. Either way, a failed inspection is cheaper than finding out at 70 mph.
One last line on this. Brakes are the one system where "I'll get to it next month" has a real cost attached. If any red flag on that table applies to you, deal with it this week.
Brake Rotor FAQs: Thickness Specs, Break-In, and Replacement Timing
How do I know when to replace brake rotors?
Measure them. If the rotor is at or below the stamped minimum thickness, it needs replacement. So does any rotor with cracks, deep scoring, heavy pitting, or a lip deep enough to catch a fingernail.
Mileage alone never decides it, because wear rates vary too much between vehicles and drivers.
Can I replace rotors without replacing the pads?
Yes, but only if the pads have plenty of life left and are wearing evenly. Most people replace them together because new pads bed better on a fresh surface. Putting worn pads on a new rotor can leave uneven contact and shorten the pad's remaining life.
How long do brake rotors last?
Most rotors last somewhere between 30,000 and 70,000 miles, but that range hides enormous variation. A highway commuter might see 90,000 miles from a set. A towing truck in a salt-belt state might need rotors at 35,000.
Check thickness at every pad change rather than following an odometer rule.
Can I resurface rotors instead of replacing them?
Sometimes, if the rotor is well above its minimum and has no cracks or hard spots. Most modern rotors leave the factory with only about 2 mm of service allowance, so there's often nothing safe to machine off. New rotors frequently cost about the same as the labor to turn old ones.
Do brake rotors have to be replaced in pairs?
Yes, on any street car. Both rotors on the same axle should match in thickness and condition, or braking force splits unevenly and the car pulls. You can do the front axle now and the rear later, as long as each axle is done as a matched set.
How do I break in new rotors and pads?
Make six to eight moderate stops from 50 mph down to 10 mph, spaced about 30 seconds apart. Follow with two or three harder stops from 60 mph, then drive for 10 to 15 minutes without heavy braking to cool everything. Avoid holding the pedal at a standstill while the brakes are hot.
The Ten-Minute Inspection: Tools, Order of Operations, and What to Record
You don't need a lift to settle this. You need the wheel off, a light, and one accurate measurement. Everything else is looking closely and writing the numbers down.
Start with the free checks while the car still sits on the ground. Look through the wheel spokes at the rotor face. Heavy rust rings, blue patches, and a raised lip are all visible without removing anything.
If a dash warning light came on with the vibration, reading stored fault codes at home tells you whether ABS is involved before you commit to a brake job.
Then raise the car. Drive-up ramps you build yourself are the sturdiest option for a slow visual pass, and they put you at eye level with the rotor edge. For anything that needs the wheel off, use a proper jack and stands on flat, hard ground.
Here's the kit that does the whole job.
| Tool | Purpose | Rough cost |
|---|---|---|
| Outside micrometer, 0 to 25 mm or 0 to 1 in | Rotor thickness | $35 to $120 |
| Dial indicator with magnetic base | Lateral runout | $40 to $90 |
| Torque wrench, 1/2 in drive | Correct clamp load | $50 to $150 |
| Brake cleaner and lint-free rags | Surface prep before measuring | $10 |
| Wire brush or Roloc disc | Hub face and rotor edge cleaning | $15 to $40 |
| Bright LED light and a notebook | Seeing detail and recording it | $15 |
Should you measure first or look first?
Measure first. Thickness is the disqualifier, and everything else is secondary once that number fails. If the rotor is under spec, cracks and lip depth become interesting details rather than decision-makers.
The practical order runs like this.
- Chock the rear wheels and crack the lug nuts loose while the car is still down.
- Raise and support the car, then pull the wheel.
- Photograph the rotor face and pad thickness before you clean anything.
- Wipe the friction face with brake cleaner until the rag comes away clean.
- Measure thickness at eight points around the face, about 10 mm in from the edge.
- Compare the lowest reading against the stamped minimum.
- Inspect for cracks, scoring, blueing, and lip depth.
- Check runout with the dial indicator if you have one.
- Record it all, then reassemble to torque spec in a star pattern.
That sequence matters. Cleaning before measuring prevents a layer of rust from reading as worn metal. Recording before reassembly prevents the "was it 25.6 or 26.6" problem three months from now.
What should go in the notebook?
Write down six things: date, mileage, lowest measured thickness, highest measured thickness, stamped minimum, and remaining pad material in millimeters. That's your baseline.
Next year, the same six numbers tell you the wear rate. A rotor that dropped 0.4 mm in 12,000 miles has a predictable retirement date. One that dropped 1.1 mm has a seized caliper or a driving pattern problem.
Two extra notes earn their space too. Record the pad brand and compound, and whether you cleaned the hub face. Those two details explain most repeat pulsation complaints later.
What if you don't have a micrometer?
Buy one, or pay someone to measure. A caliper is a rough sanity check at best, and eyeballing thickness is guesswork. A $35 micrometer costs less than one wasted rotor.
The good news is that a basic 0 to 25 mm or 0 to 1 inch outside micrometer is accurate enough for this job and lasts decades. Store it with the anvils slightly open and it'll outlive the car.
Regional Rules and Inspection Standards: What Makes a Rotor Legal
A rotor's minimum thickness isn't a shop preference. It's tied to how the vehicle was certified to stop. In the US, FMVSS 135 sets the performance envelope for passenger car brake systems, and a rotor turned below its stamped limit sits outside that certified design.
Europe runs a different but equally firm system. Replacement discs sold there must carry UNECE R90 approval, which covers dimensions, material, and performance equivalence to the original part.
That approval shows up as an R90 marking on the rotor or its box, along with the approval number. Fitting an unmarked disc in a regulated market can fail an inspection and complicate an insurance claim. If you're buying parts in Europe, look for the mark.
| Region | Rule or test | What it means for your rotors |
|---|---|---|
| United States | FMVSS 135 plus state safety inspections | Rotor condition checked in inspection states, no federal replacement rule |
| United Kingdom | Annual MOT test with a brake efficiency check | Corroded, cracked, or badly lipped discs fail outright |
| European Union | UNECE R90 for replacement brake parts | Discs must be approved and marked |
| Canada | Provincial safety inspections on transfer and import | Thickness and corrosion both get looked at |
What actually fails an inspection
Inspectors aren't measuring to a tenth of a millimeter on every car. They're looking for the obvious condemnations. Cracks in the friction face, heavy pitting, a lip sharp enough to cut, and any sign of metal-on-metal contact will fail a car in most jurisdictions.
Corrosion is the big one in the UK and in northern US states. A disc that's structurally fine but scaled with deep edge rust is a legitimate failure, and it's the same corrosion pattern covered earlier on cars that sit or run mostly on regen.
Thickness gets checked when there's a reason to check it. A scored face or a pulsation complaint usually triggers a measurement, and that's when a marginal rotor gets written up.
Does the parts market affect the rule?
It does, quietly. In Europe, R90 approval limits how cheap a legal replacement disc can be, because testing costs money. That's part of why European rotor prices sit higher than budget US listings.
In the US, no equivalent approval exists for aftermarket rotors. Quality varies more, and the spec sheet becomes your only protection. A listing that states the minimum thickness and the material grade is a listing from a manufacturer who expects to be measured.
Worn steering joints can fail a roadworthiness check on the same visit, so it pays to know whether premium steering parts actually pay off before you approve extra work on the estimate.
Edge Cases: The Rotors That Sit Right on the Line
Real cars rarely land in neat categories. Here are the situations that come up most, answered straight.
My rotor is 0.3 mm above minimum. Replace it now?
No, but plan for it. Measure again at your next pad change, and expect replacement then. A rotor that close to the limit has no machining allowance left, so a resurface would push it under spec immediately.
Pads-only is the only sensible move in the meantime.
There's rust on the face but I can't feel pitting. Replace?
No. Surface flash rust is normal and clears within a few stops of driving. Run a fingernail across the face.
If it glides over the rust, keep the rotor. If the nail catches in pits, the metal is gone and the rotor is finished.
The car sat for two years. Do I need rotors?
Maybe. Sitting is harder on brakes than driving. Check for pads bonded to the face, rust jacking at the backing plates, and pitting deep enough to feel.
If the pads freed up cleanly and the face is smooth, you may only need a careful bed-in and a fluid flush.
One track day. Did I cook them?
Probably not, unless you stayed out for long sessions on street pads. Light crazing across the face is normal after hard heat cycles and isn't a condemnation on its own. Cracks you can catch a fingernail in are.
Measure thickness too, because track use eats material fast.
I'm buying a used car with unknown brake history. What do I check?
Pull a front wheel and measure. If the seller won't allow it, price a full axle job into your offer. Look for mismatched rotors side to side, which suggests one corner was replaced on its own, and check the pad wear pattern for a dragging caliper.
The shop says my rotors are fine, but the pedal still pulses.
Then the problem isn't thickness. Ask for the runout reading and the thickness variation figure. A thick rotor with 30 microns of variation will pulse happily.
The fix is a resurface if there's allowance, or a hub face clean and re-bed if the rotor is nearly new.
Can I do just the fronts if the rears look fine?
Yes. Per-axle matching is the rule, not all-four. If the rear rotors measure well above minimum with even pad wear, leave them and spend the money on the front axle.
Just don't replace one front rotor and not the other.
The vibration shows up without braking at all.
Then stop chasing rotors. A shimmy at steady speed that fades when you slow is tires, wheels, or chassis. Worn steering joints and tired bushings mimic brake judder closely, and factory-spec chassis parts often fix it for less than a second set of discs.
Living With New Rotors: The First 500 Miles and the Years After
The first few hundred miles set the tone. New rotors and pads need to build a transfer layer, and that layer forms best under moderate, varied use. Easy city driving for a week doesn't do it.
Follow the bedding sequence, then drive normally. Avoid panic stops for the first 200 miles if you can. Avoid riding the pedal downhill, and avoid holding the car at a light with the brakes hot.
You'll notice a faint metallic smell and slightly reduced bite for the first few stops. Both are normal. A grinding noise, a pull, or a pedal that sinks is not, so stop and investigate.
What does long-term care actually look like?
Less than you'd think. Four habits cover almost everything.
- Measure thickness once a year, ideally after winter.
- Service the caliper slide pins every 30,000 miles, or annually in salt-belt regions.
- Flush the brake fluid every two to three years, because moisture drives caliper and piston corrosion.
- Clean the hub face at every wheel-off service, whether or not you're touching the brakes.
That last one costs five minutes and prevents the runout that starts the whole pulsation cycle. It's the cheapest habit in this article.
Preparing for winter and coming out of it
Before the salt arrives, clean the rotor edges and check that the pads move freely in the brackets. Seized pads are what turn a rusty edge into a scored face. A little high-temperature silicone grease on the pin boots helps, and nothing goes on the friction surface.
After winter, look for a rust ridge that's grown inward and pitting on the unswept band. Clean the faces with a few firm stops on a dry road and re-check thickness. Corrosion steals metal too, just more slowly than friction.
If you take the wheels off for the seasonal swap, resist the air-gun habit and tighten to spec instead. Uneven clamp load distorts the hat, and that's the runout you'll be measuring in June.
Corroded wheel fasteners are worth replacing rather than reusing, especially after several winters of road brine. Fresh hardware is one of the cheaper line items on a brake job and one of the few that prevents a repeat visit.
Storing a car for months
Leave the parking brake off and chock the wheels instead. Pads held against a damp rotor for three months can bond to the surface, and pulling them free often takes friction material with them.
Overinflate the tires slightly and expect some surface rust on the faces when you return. That rust is cosmetic until it pits.
The Final Decision Path: Matching What You Found to What You Do
Here's the whole thing on one page. Find your finding in the left column, follow it across.
| What you found | What to do | How soon |
|---|---|---|
| Thickness at or below stamped minimum | Replace, axle pair | Before more driving |
| Thickness within 0.5 mm of minimum | Replace at next pad change, no machining | Plan it |
| Comfortably above minimum, face smooth, no cracks | Keep, check pads and bed-in | Routine |
| Cracks you can catch a fingernail in | Replace | This week |
| Light crazing with no depth | Keep, monitor | Next service |
| Scoring with raised metal edges | Replace, inspect pads for the cause | This week |
| Rust lip deep enough to catch a nail | Replace or machine if allowance exists | This month |
| Flash rust only, no pitting | Keep driving | Nothing |
| Pitting you can feel | Replace | This month |
| Pulsation with a thick, smooth rotor | Re-bed, or resurface if allowance exists | Try the free fix first |
| Pulsation back within a few thousand miles of machining | Replace | This month |
| Grinding under braking | Stop driving, replace rotors and pads | Today |
| Pad at 2 mm or less, rotor in spec | Pads only | This month |
| Uneven pad wear side to side | Diagnose the caliper before buying parts | Before the repair |
How do I run this on my own car in one pass?
Measure, compare, inspect, then decide. Thickness against the stamp is the first gate. Surface condition is the second.
Everything else is timing and pairing.
If the rotor passes both gates, you're done, and the money goes to pads. If it fails either one, replacement is the answer and machining rarely changes it on a modern rotor.
The last thing worth saying is the simplest. Rotors don't retire on a schedule. They retire when the metal runs out, when the casting cracks, or when corrosion eats the face.
Measure once a year, write the number down, and you'll never be surprised by a brake bill again.
