
Your parking brake grabs too early, or it pulls to the ceiling and nothing happens. Learning how to adjust a parking brake starts with one question: which system is actually under your car? A 2009 Civic with a cable lever is a different job from a 2023 model with a push-button brake.
Guess wrong and you'll either cook the rear brakes or destroy a $400 actuator.
The numbers matter more than the feel. Factory manuals quote lever travel in clicks and shoe clearance in thousandths of an inch. The UK MOT test asks for at least 16% braking efficiency on most cars.
As of 2026, most new cars in the US and Europe ship with an electronic parking brake. Here's how to tell which one you have.
How to Adjust a Parking Brake
Adjusting a parking brake starts with matching the fix to the hardware. On a cable lever, turn the adjuster nut until travel hits the factory spec. On drum brakes, set the star wheel before you touch the cable.
Electronic parking brakes need service mode and a scan tool, never a wrench. Chock the wheels and inspect the shoes first.
Why a Parking Brake Adjustment Is Safety Work, Not Just Maintenance
A parking brake is the last line of defence between a parked car and a runaway car. That sounds dramatic until you've watched a vehicle roll down a driveway because someone "tightened the cable" and called it done. The system doesn't just hold the car.
It's also the mechanical backup for your hydraulic brakes if a line lets go on a mountain descent.
In our research, the failure pattern is boringly consistent. Most parking brake problems trace back to one of three things: a stretched cable nobody adjusted, worn shoes hidden behind a tight cable, or an electronic actuator forced past its travel limit by someone with a wrench and good intentions.
What the rules actually require
Federal Motor Vehicle Safety Standard 135, the US rule covering light vehicle brake systems, requires a parking brake to hold the vehicle stationary on a 20 percent grade in both directions. That's roughly a 1-in-5 slope, and it's steeper than most people picture. The full text sits on the NHTSA website if you want to read the source.
The UK uses a different yardstick. The DVSA MOT inspection manual calls for a parking brake efficiency of at least 16% of the vehicle's weight for most cars, measured on a roller brake tester. Failing that test means no certificate, no insurance cover in practice, and a retest fee.
Both standards exist for the same reason. A parking brake that holds on flat ground but not on a hill is not a working parking brake.
- Rollaway risk. A car that creeps on an incline can injure someone in seconds.
- Rear brake damage. Over-tightening turns your rear brakes into a drag brake that overheats and warps rotors.
- Inspection failure. Efficiency tests catch slack cables that feel fine in the driveway.
- Hidden wear. A cable cranked tight can mask shoes that are down to the rivets.
- Resale liability. Undisclosed brake faults are a genuine legal exposure if the car is sold.
One more thing worth saying plainly. If your car rolls on a hill, you don't push it back by hand. You winch it, and that means knowing where a proper tow hook sits on the chassis before you need it.
How the System Actually Works: Cables, Levers, Star Wheels, and EPB Motors
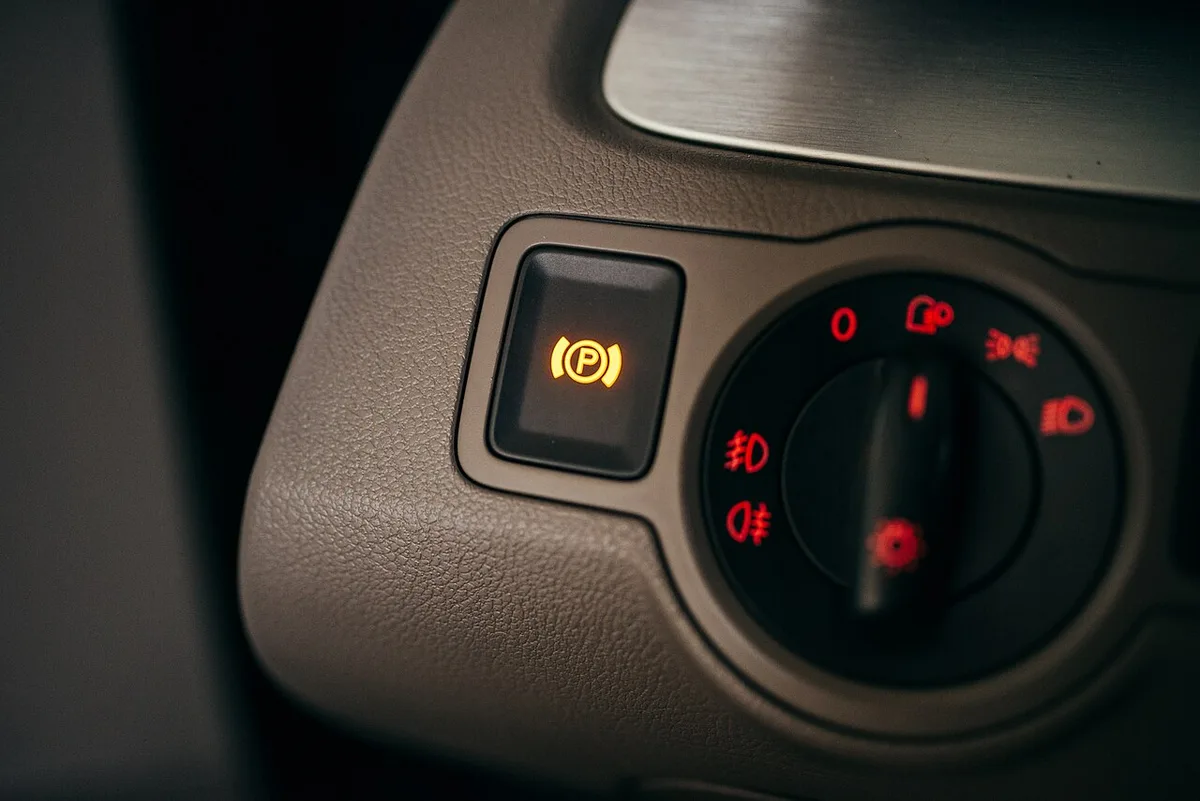
Image source: Wikimedia Commons / Shixart1985 (CC BY)
Every parking brake does the same job with the same basic trick. Something pulls a mechanical linkage that clamps a friction surface against a rotating part. What changes is the route that force takes.
On a classic lever system, your arm pulls a handle that rotates a ratchet. A pawl locks into the ratchet teeth and holds the position. The handle pulls a front cable, which meets an equalizer bar, which splits the pull into two rear cables.
Each rear cable ends at a lever arm on the brake assembly.
From there the layout branches.
- Rear drum brakes. The cable pulls a lever that pushes the shoes apart against the drum. A star wheel adjuster sits between the shoes and sets the resting gap.
- Drum-in-hat. The car has rear discs for normal braking, but a small drum brake lives inside the hat of the rotor, purely for parking. Same shoes, same star wheel, tighter space.
- Caliper with a lever. The cable works a lever on the caliper that drives a screw piston outward. The piston threads in and out, so it cannot be pushed back with a C-clamp.
- Electronic parking brake. A motor and gearbox replace the cable entirely. The motor turns the same screw piston, or in some designs pulls a cable, and a control module decides how far to travel.
The parts that fail first
Cables fail from the inside out. Moisture gets past a cracked boot or a worn grommet, the steel strands rust, and the cable stops sliding freely inside its housing. You feel it as a lever that pulls up easily but doesn't return.
The equalizer bar is the second weak point. If one rear cable seizes, the bar tilts and sends all the tension to one side. The car holds on one wheel and passes a driveway test, then fails on a slope.
The star wheel is the third. It's a small threaded wheel that walks the shoes outward as the lining wears. It lives behind a rubber plug on the backing plate, or under the drum.
If it's seized or installed backwards, no amount of cable adjustment will fix your lever travel.
| System layout | What actually moves the brake | Where you adjust |
|---|---|---|
| Rear drum with cable | Cable pulls shoe lever | Star wheel, then cable nut |
| Rear disc, drum-in-hat | Cable pulls small shoe set | Star wheel inside rotor hat |
| Rear disc, caliper lever | Cable turns a screw piston | Cable nut, plus lever free play |
| Electronic parking brake | Motor drives screw piston | Service mode and scan tool |
If you're planning to get under the car, sturdy support matters more than speed. A pair of wooden wheel ramps built to the right dimensions is safer than a jack any day.
First Fork in the Road: Cable Adjuster, Drum Star Wheel, or Electronic Parking Brake
Before you turn a single nut, identify what you're looking at. This is the step that decides whether the job takes twenty minutes or turns into a four-hundred-dollar mistake.
Pop the rear wheel off and look at the back of the brake assembly. You're looking for one of four things: a cable running to a lever on a drum backing plate, a cable running to a lever on a caliper, a small drum nested inside a rotor, or a motor bolted to the caliper with a wiring harness plugged into it.
If you see wires and a motor, stop. That's an electronic parking brake, and it does not respond to cable logic.
If you see a cable and a drum
Then the star wheel is your first stop, not the cable nut. Pull the drum, check the lining thickness, and set the shoe-to-drum gap. Adjust the cable last, and only if lever travel is still out of spec afterward.
Cranking the cable on worn shoes just hides the wear and creates drag.
If you see a cable and a caliper with a lever
Then the cable nut is a legitimate adjustment point. But check the lever's return spring and free play first. A lever that doesn't fully return means a seized cable or a corroded pivot, and tightening the nut will make that worse, not better.
If you see a motor on the caliper
Then you need a scan tool that can command service mode. Most modern diagnostic platforms handle this, and picking a capable scan tool is worth the research if you plan to keep the car long term. Never unplug the motor and apply 12 volts to "see what happens".
The module stores a fault, and on some makes it needs a dealer-level reset to clear.
If you're not sure which rear brake you have
Use the VIN and check the factory parts catalogue, or look at the build sticker. Trim levels and market packages change rear brake hardware more often than owners expect. A car sold with 15-inch wheels often has drums, while the same model on 17s came with discs.
| What you see at the rear wheel | System | Your first move |
|---|---|---|
| Cable into a backing plate lever | Rear drum | Pull drum, inspect shoes, set star wheel |
| Cable into a caliper lever | Mechanical disc parking brake | Check lever free play, then cable nut |
| Small shoes inside a rotor hat | Drum-in-hat | Set star wheel through the backing plate hole |
| Motor and harness on caliper | Electronic parking brake | Enter service mode with a scan tool |
Know Your Numbers Before You Turn Anything
Specs beat instinct every time. "Feels about right" is how people end up with dragging brakes or a lever that reaches the top of its arc before anything happens. Get the number from your factory service manual, then work toward it.
Lever travel in clicks and free play
Lever travel is the headline number. Most manufacturers publish it as a click count, and you measure it by pulling the lever slowly and counting the ratchet clicks until it's fully engaged.
A typical range sits between four and eight clicks, but yours might not. Some cars spec five to seven. Some spec seven to nine.
Some specify a force at the lever instead, measured in Newtons, which is a far more repeatable test than counting clicks by feel.
Free play is the slack before the mechanism engages. It's usually measured at the lever or at the cable end, and it exists so the brake doesn't drag when released. Too little free play and the shoes kiss the drum constantly.
Too much and you lose travel that should be doing work.
- Count clicks from fully released to fully engaged. Write the number down before you change anything.
- Check that both rear wheels engage. One side lagging points to a seized cable or a tilted equalizer.
- Verify the lever returns fully on its own. If it needs help, the cable is sticking.
- Pull the lever with the wheels off the ground. Both rear wheels should lock or drag evenly.
Shoe-to-drum clearance and adjuster torque specs
Shoe-to-drum clearance is the gap between the lining and the drum surface with the brake released. Manuals express it in thousandths of an inch, and it's small. Think a few thousandths, not a few sixteenths.
You can measure it with a feeler gauge through the backing plate hole. Most people don't. The practical test is drag based: with the wheel on and the brake released, the wheel should spin freely with a light, even scrape.
If it stops within a quarter turn, it's too tight.
Adjuster torque matters on the cable nut. Some manuals specify a Newton-meter value at the equalizer, and some specify a number of threads or a measurement between the equalizer and a reference point. Overtightening here is the single most common DIY error on cable systems.
| Specification | Typical published range | Where to find yours |
|---|---|---|
| Lever travel | 4 to 8 clicks | Factory service manual, brake section |
| Lever force at engagement | Model specific, in Newtons | Factory service manual |
| Cable free play | Small gap at lever or cable end | Factory service manual |
| Shoe-to-drum clearance | A few thousandths of an inch | Factory service manual |
| Adjuster nut torque | Model specific, in Nm | Factory service manual |
| MOT parking brake efficiency | 16% minimum for most cars | DVSA inspection manual |
Torque values for the wheel fasteners matter too, and they're not a place to freestyle. An impact gun makes short work of removal, but hammering fasteners back on with one is how studs get stretched and rotors get warped. If your nuts are past their best, budget for fresh wheel fasteners before you start.
The Quick Answer: What a Correctly Adjusted Handbrake Should Feel Like
A correctly adjusted handbrake feels firm about a third of the way through its travel and holds the car on a steep hill at four to seven clicks. It should not feel spongy, and it should not need two hands.
Here's the feel test that experienced techs use. Pull the lever slowly. You want resistance building early, a positive ratchet click at each notch, and a hard stop well before the lever reaches your thigh.
If the lever sails upward with almost no resistance, the cable is slack or the shoes are worn.
Release the lever and listen. A healthy system returns with a clean snap. A lazy return, or a lever you have to push down, means a sticking cable or a corroded pivot.
On the road, the check is simple. Park on a quiet incline, set the brake, shift to neutral, and take your foot off the service brake. The car should hold without creeping.
Do this with someone outside the vehicle and away from the wheels, never standing behind it.
For an electronic parking brake, the equivalent check is a warning light that stays off after the apply cycle and a car that holds on the same incline. If the light flashes or the module logs a fault, the system is telling you something and it isn't "try again harder".
Finally, expect a settling period. New cables and new shoes bed in over the first few hundred miles, and lever travel often drifts slightly. Recheck after 200 to 500 miles and readjust if needed.
Tools, Prep, and the Steps Most People Skip
Most parking brake jobs fail before the first wrench turns. The car isn't secure, the lever is still engaged, or the wheels aren't chocked. Ten minutes of setup prevents a very bad afternoon.
What you actually need
| Tool | Why it earns its place |
|---|---|
| Wheel chocks | The entire job depends on the car not moving |
| Trolley jack and axle stands | Nothing gets done under a jack alone |
| Torque wrench | Wheel nuts, caliper brackets, lever mounting bolts |
| Brake spoon or adjuster tool | Turns the star wheel through the backing plate |
| Feeler gauge | Checks shoe-to-drum clearance properly |
| High-temp brake lubricant | Star wheel threads and shoe contact pads only |
| Penetrating oil | Frees rusted adjuster nuts before you round them |
| Infrared thermometer | Turns the drag test into a number instead of a guess |
| Scan tool with EPB function | Service mode, calibration, code clearing |
| Nitrile gloves and eye protection | Brake dust is not something to breathe |
You won't need every item for every car. A cable-only adjustment on a five-year-old hatchback is a wrench, a chock, and twenty minutes. A drum rebuild on a salt-belt truck is most of that table.
The prep steps that get skipped
- Park on flat, hard ground. Gravel and slopes are where jack stands sink or tip.
- Chock the front wheels, both directions. Two chocks, not one brick.
- Transmission in gear or Park. It's a backup, not the main restraint.
- Release the parking brake before you adjust anything. Adjusting with the brake applied gives you a false reading and a slack cable after release.
- Crack the wheel nuts loose while the car is still on the ground. Doing it in the air is how wheels spin and studs bend.
- Lift both rear wheels, not just one. You can't compare left against right with one side on the floor.
- Write down the baseline click count. You need a before number to judge the after number.
- Photograph the cable routing. Clips and grommets go back the way they came out, and memory lies.
If you'd rather not trust a scissor jack on a driveway, a set of home-built ramps built to a proper rise angle gives you far more stability than any jack.
How long should this take?
A cable adjustment runs 20 to 40 minutes once the car is up. A drum inspection plus star wheel setting plus cable adjustment is 1 to 2 hours, and that assumes nothing is seized.
Electronic parking brake pad service with a scan tool takes 1 to 2 hours on most cars. Add time if you have to chase a fault code afterward.
Two safety habits worth building
Brake dust from older vehicles can contain hazardous fibres, so don't blast it with compressed air. Wipe components with brake cleaner and a rag, and wear a mask if you're doing a full drum teardown.
Second, never put any part of your body under a car that's only held by hydraulics. Stands go in before hands go under.
Adjusting a Lever-and-Cable Parking Brake, Step by Step
This is the classic job, and it's the one most guides half explain. The cable does nothing useful until the shoes and the star wheel are right. Get the order wrong and you'll chase lever travel forever.
Finding the adjuster nut and equalizer bar
The equalizer bar is the yoke or bracket where the single front cable splits into two rear cables. The adjuster nut usually sits on a threaded rod just ahead of it. Pulling on the rod shortens the effective cable length, which reduces lever travel.
Where it lives depends on the car.
| Design | Where the adjuster sits | Access |
|---|---|---|
| Hand lever, console mounted | Threaded rod at the lever base, under the console trim | Inside the car, often behind a small panel |
| Hand lever, floor mounted | Equalizer under the floorpan, mid-car | Under the vehicle |
| Foot pedal parking brake | Ratchet assembly at the pedal, plus equalizer underneath | Both ends |
| Split rear axle setup | Equalizer above the rear axle or at a frame bracket | Under the vehicle, tight access |
Start at the lever. Pop the console cover or the small access panel and look for a threaded rod with two nuts on it. If you find one nut and a clevis, you likely adjust at the equalizer instead.
Then follow the cable back. Have someone pull the lever slowly while you watch the equalizer move. If the bar tilts instead of pulling straight, one rear cable is seized or badly stretched, and that's a replacement job, not an adjustment.
Setting tension without over-tightening
Work in small steps and measure after each one. A quarter turn on a fine thread moves lever travel more than most people expect.
- Release the lever fully. Confirm the rear wheels spin freely before you start.
- Hold the cable end with a second wrench. Otherwise the whole rod spins and you learn nothing.
- Loosen the locknut. Penetrating oil first if it's rusted. Rounded nuts are a common outcome of impatience.
- Turn the adjuster nut one to two turns at a time. Tightening takes up slack. On most layouts the nut moves toward the front of the car to shorten the cable.
- Recheck the click count after every couple of turns. Pull slowly, count until fully engaged, compare to your factory spec.
- Spin both rear wheels with the lever released. They should turn with a faint, even scrape. If either one drags hard or stops within a quarter turn, back the nut off.
- Confirm the lever returns on its own. If it needs a nudge, stop and inspect the cable for seizure.
- Torque the locknut to spec and recheck travel. The number shouldn't shift, but verify it.
- Repeat on the other side if your layout has separate rear adjusters. Some do, many don't.
Two hard stops. If the adjuster nut bottoms out on its thread and travel is still too long, the cable is stretched or the shoes are worn. Stop and diagnose instead of stacking washers.
And if the lever feels firm but the car still rolls, you've just proven the problem is at the wheel end. Go back to the drum.
Adjusting at the lever versus adjusting at the equalizer
Adjusting at the lever base is easier but affects the whole system evenly, which is fine when both sides are healthy. Adjusting at the equalizer lets you see the split and spot a lazy cable.
Most factory manuals specify one primary adjustment point. Use that one. Turning both is how cars end up over-tightened with no thread left for the next owner.
The Star Wheel: Setting Shoe-to-Drum Clearance the Right Way
The star wheel is the small threaded adjuster sitting between the shoe ends. Its job is to keep the shoes close to the drum as the lining wears down. When it seizes or is set wrong, no cable adjustment can compensate.
You're at the right place if lever travel is long, the cable looks healthy, and one rear wheel spins more freely than the other.
Drum-in-hat rear rotors and the drag-then-back-off method
Drum-in-hat setups nest a small parking brake shoe set inside the hat of the rear rotor. Same principle, less space, and the adjuster is reached through a rubber plug in the backing plate.
- Remove the wheel and the caliper. On drum-in-hat, hang the caliper aside. Never let it dangle by the hose.
- Pull the rotor or drum. If it won't come off, back the star wheel off first through the plug hole. Don't hammer it.
- Inspect before adjusting. Check lining thickness against the service limit, look for oil or fluid contamination, and check for a leaking wheel cylinder or axle seal.
- Clean and lubricate correctly. High-temp brake lubricant on the star wheel threads and the shoe contact pads on the backing plate. Nothing on the lining, ever.
- Refit the drum or rotor and set the wheel spinning. Turn the star wheel through the plug hole until the wheel locks or drags heavily.
- Back off five to seven clicks. Most manuals land in that range. The target is a light, even drag you can hear and feel.
- Press the brake pedal firmly several times. This centres the shoes and settles the self-adjuster.
- Recheck the drag. Adjust again in single clicks if it's still too tight or too loose.
- Only now adjust the cable. Lever travel is the last thing you set, not the first.
Typical published clearance runs around 0.010 to 0.025 inch (0.25 to 0.6 mm), and a feeler gauge through the plug hole is the accurate way to check. The drag test is what most techs actually use, because it accounts for drum wear and out-of-round.
If the wheel locks solid and stays locked after you back off, the self-adjuster lever or strut is jammed. That's a hardware problem inside the drum, and you'll need to pull it apart.
Which way the adjuster turns on each side
Star wheels are mirror images. On one side you turn the tool upward to tighten, on the other side you turn it downward. There's no universal rule that survives every car.
The practical test is safe and quick. Turn the star wheel a few clicks and spin the wheel. If drag increased, you're going the right way.
If it got looser, reverse direction.
Some adjusters are also left-hand threaded. Force is the enemy here. If it won't budge with reasonable pressure, it's seized, and the correct fix is to remove the drum and free it properly.
One more trap. When fitting new shoes, the self-adjuster lever has to sit on the correct side of the star wheel teeth. Flip it the wrong way and the brake will loosen itself as you drive.
| Symptom | Likely cause | Fix |
|---|---|---|
| Lever pulls high, cable looks fine | Shoes far from drum | Set star wheel first |
| One wheel drags, other spins free | Seized star wheel or cable on one side | Free or replace that side |
| Brake loosens itself over weeks | Self-adjuster lever fitted backwards | Reinstall correctly |
| Wheel locks and won't free after backing off | Jammed strut or adjuster | Full drum teardown |
Electronic Parking Brakes: Service Mode, Caliper Retraction, and Calibration

Image source: Wikimedia Commons / Ardfern (CC BY-SA)
An electronic parking brake replaces the cable with a motor and gearbox bolted to the caliper. A control module decides how far the motor travels, how hard it clamps, and when to reapply. There's no nut to turn, and trying to find one wastes an afternoon.
These systems also do more than hold the car. Many handle hill start assist, auto-apply on ignition off, and dynamic emergency braking if you hold the switch at speed.
| EPB design | How the piston moves back | What you need |
|---|---|---|
| Motor on caliper, screw piston | Motor rotates the piston inward in service mode | Scan tool with EPB function |
| Motor winding a cable | Motor slackens a short cable to the caliper | Scan tool, plus cable condition check |
| Manual emergency release | Bowden cable under the load floor or console | Owner's manual procedure, no tools |
Entering service mode safely
Connect a battery maintainer before you start. A voltage dip mid-cycle can leave the module in a fault state that needs a dealer-level reset to clear.
Then command service mode or maintenance mode from the scan tool. The motors whine briefly and the pistons retract. Some cars also allow a manual button sequence, and your owner's manual or factory procedure will list it if yours does.
Once the pads are swapped, exit service mode and let the system run its apply and release cycle. Many cars then want a short drive above a set speed before the calibration completes. Skip that step and the warning light stays on.
Why forcing an EPB piston wrecks the actuator
The piston on a screw-type caliper has to rotate as it retracts. Push it with a C-clamp and you're fighting an internal threaded nut that isn't designed for axial load. The result is a stripped nut, a cracked piston, or a gearbox full of broken teeth.
The actuator itself is a small motor driving a reduction gearset, often with nylon or composite gears. Those gears handle clamping force in one direction. They don't handle a wrench, a hammer, or 12 volts applied directly to the motor terminals.
Back-probing the motor circuit is the other classic mistake. Modern modules monitor current and detect faults fast, and some will latch a code that a generic tool can't clear.
Replacement costs reflect all this. An aftermarket EPB actuator typically runs $150 to $600, and some OEM units go well past that. A ruined caliper adds another few hundred on top.
Resetting the warning light after a pad change
Clear codes only after a successful apply and release cycle. Clearing first, then discovering the cycle fails, leaves you with no diagnostic information.
If the light persists, check the obvious things before assuming a module failure. Confirm the connector is fully seated and dry. Confirm the pad thickness sensor is plugged in if the car has one.
Confirm the battery is healthy, because low voltage causes more phantom EPB faults than anything else.
Then run the calibration or "reset" function the scan tool offers. If the tool you have doesn't list EPB functions for your model, that's a limitation of the tool, not proof the car is broken. A diagnostic platform that actually supports service functions saves a dealer trip on its own.
One thing worth knowing before you need it: nearly every EPB has a mechanical release for a dead battery. It's usually a cable under the load floor or a procedure in the owner's manual. Find yours now, not on a hill with a flat battery.
Testing the Job: Drag Test, Left-Right Symmetry, and the Hill Hold Test
Adjustment without verification is a guess. Three checks catch almost every mistake: heat, symmetry, and an incline.
The drag test: heat is the tell
A dragging parking brake doesn't announce itself. It quietly cooks the drum, glazes the lining, and warps rotors over a few hundred miles.
Drive 5 to 10 miles at moderate speed with minimal braking. Stop somewhere safe and measure hub or drum temperature on both rear wheels with an infrared thermometer. Compare rear to rear first.
A dragging side often reads 50 to 100 degrees F hotter than the opposite side. If both rears are much hotter than the fronts, the cable is too tight or both star wheels are over-adjusted.
If you don't have a thermometer, use your hand, carefully, near but not on the wheel. A rear wheel you can't comfortably hold a palm against after a gentle drive is suspect.
Left-right symmetry
With both rear wheels off the ground, apply the lever three clicks and try to turn each wheel by hand. Both should feel the same resistance.
One side locking while the other still spins points to a tilted equalizer bar, a seized cable, or a star wheel set differently side to side. On gravel or a loose surface, a low-speed test with partial application will show the same imbalance as uneven wheel lockup.
Cable pull should also be linear. If the lever feels like it grabs then goes light, a cable is binding inside its housing.
The hill hold test, done properly
Federal Motor Vehicle Safety Standard 135 uses a 20 percent grade, which works out to roughly 11 degrees, in both directions. That's steeper than most driveways and a fair benchmark.
Find a quiet incline with no traffic. Keep the driver in the seat with a foot ready over the service brake. Set the parking brake, shift a manual into neutral or an automatic out of gear, and release the foot brake.
The car should hold without creeping. Any movement means the job isn't done, whatever your click count says.
Never stand behind or in front of the vehicle during this test. And never use a person as a wheel chock, which sounds obvious until you've seen someone try it.
| Test | Pass looks like | A fail usually means |
|---|---|---|
| Drag test | Rear hubs similar temperature, close to fronts | Cable too tight or star wheel over-adjusted |
| Symmetry check | Both rear wheels drag evenly at 3 clicks | Seized cable or tilted equalizer |
| Hill hold, 20% grade | Car stays put in both directions | Insufficient travel or worn shoes |
| Lever return | Snaps back fully and cleanly | Sticking cable or corroded pivot |
Recheck after the settling period
New cables stretch and new shoes bed in. Lever travel often drifts a click or two in the first few hundred miles.
Check again at 200 to 500 miles and adjust only if travel has moved outside spec. After that, an annual check before winter is enough for most cars, and it's cheap insurance against a seized cable in February.
Mistakes That Cook Rear Brakes and Strip Adjuster Nuts
Most of these mistakes feel like progress at the time. That's what makes them expensive. The damage usually shows up a few hundred miles later, long after you've put the tools away.
Over-tightening is the number one DIY error
Tightening past the spec feels productive. Lever travel shrinks, the brake feels grabbier, and the job looks finished.
Then the shoes stop fully retracting. They kiss the drum on every rotation, and that friction becomes heat. Within a few hundred miles you've got glazed lining, a blue drum, and a car that pulls when you brake.
The tell is temperature. A dragging rear wheel runs noticeably hotter than the opposite side. In our research on brake drag complaints, that detail comes up again and again: the owner adjusted until the lever felt right, never checked wheel heat, and found the problem at the next inspection.
Over-tightening also kills free play. Without free play, the self-adjuster can't ratchet, so the brake stops compensating for shoe wear entirely.
Cranking the cable to fix a shoe problem
If the shoes sit far from the drum, shortening the cable just moves the slack somewhere else. The lever feels tight, but the shoes still start too far out.
You've now got a brake that feels fine cold and fades when hot. Worse, you've used up adjustment range that the next owner will need.
Set the star wheel first. Always. The cable is the last thing you touch, and only if lever travel is still long after the shoes are correct.
Using the wrong lubricant on brake hardware
Petroleum grease and rubber don't get along. It swells the boots, softens the cable liner, and turns the star wheel threads into a sticky magnet for dust.
High-temp brake lubricant goes on the star wheel threads and the shoe contact pads on the backing plate. Nothing goes on the lining. Nothing goes on the drum surface.
A dry star wheel will seize within a season in a salt-belt state. A greased lining will grab and chatter from the first stop.
Adjusting with the brake applied
This one produces fake numbers. If the lever is up while you set the cable, the reading you take afterward is meaningless.
Release the brake fully. Confirm both rear wheels spin before you touch the adjuster. Then measure.
Skipping the chock, or trusting the jack
A parking brake adjustment means the parking brake is off. That leaves the transmission and the chocks as your only restraint.
Two chocks, front wheels, both directions. Axle stands under the rear subframe or pinch welds. Nothing goes under a car held only by a hydraulic jack.
Reusing stretched hardware and mismatched springs
Drum brake springs lose tension. Hold-down clips fatigue. The self-adjuster strut wears a groove where it contacts the shoe.
Reusing them is how a brake that was fine for years suddenly starts loosening itself. Hardware kits cost less than a tank of fuel, and they're the cheapest part of the job.
Never mix sides either. Left and right star wheels and levers are mirror images. Swap them and the brake will back itself off as you drive.
Forcing an EPB piston or motor
A screw-type caliper piston must rotate as it retracts. Push it with a C-clamp and you load a threaded nut that was never designed for axial force. The result is a stripped nut or a cracked piston.
Back-probing the motor circuit is the other classic. Modern modules monitor current and latch faults fast. Some codes need dealer-level equipment to clear.
Testing the hold from the wrong place
Never stand behind or in front of a car during a hill hold test. Never use a person as a wheel chock. Both happen more often than anyone admits.
Keep the driver in the seat with a foot ready over the service brake. If the car moves, that foot is the only thing between you and a repair bill.
Confusing Park with a parking brake
The parking pawl is a small metal finger that drops into a toothed wheel inside the transmission. It's a backup. It is not a brake.
Using Park alone on a hill puts the car's entire weight on that pawl. On some transmissions, that's how you get a very loud, very expensive noise when you shift out.
| Mistake | What it damages | The correct move |
|---|---|---|
| Over-tightening the cable | Shoes, drums, rotors, fuel economy | Set to spec, then drag test with a thermometer |
| Adjusting cable before the star wheel | Nothing gets fixed, adjustment range wasted | Shoes first, cable last |
| Petroleum grease on brake parts | Rubber boots, cable liner, star wheel | High-temp brake lubricant, sparingly |
| Adjusting with the lever engaged | False travel readings, slack after release | Release fully, verify free spin first |
| Reusing old springs and clips | Self-adjuster stops working | Fit a hardware kit every time |
| C-clamping an EPB piston | Piston, internal nut, caliper | Service mode with a scan tool |
| One chock, or none | The whole car | Two chocks, both directions |
| Standing behind the car on the hill test | You | Driver in the seat, foot on the brake |
Seized, Frozen, or Stretched: Adjust It or Replace the Cable?
A cable that has run out of adjustment has told you something. The question is whether you're looking at normal stretch or a cable that's dying. The two get confused constantly, and the fix is very different.
How to tell a sticky cable from a slack one
Disconnect the cable at the equalizer and work the inner cable by hand. It should slide through the housing with light, smooth resistance.
If it fights you, springs back slowly, or feels notchy in one spot, it's binding. If it slides freely but the lever travel is still long, you're looking at stretch or worn shoes.
Then check the return. Pull the lever up three clicks and let go. A healthy lever snaps back hard.
A lazy one means friction somewhere in the run.
Look at the cable ends too. Frayed strands, a cracked outer housing, or a split boot at the backing plate are all replacement signals. A frayed cable can snap without warning, and a snapped parking brake cable on a hill is a genuine emergency.
Why cables seize in the first place
The inner cable sits inside a plastic-lined housing. Moisture gets in past a worn boot or a cracked grommet and stays there.
Add road salt and the steel strands rust from the inside out. The rust expands, the liner grips the cable, and now the lever pulls but nothing returns.
Heat matters too. Cables routed near the exhaust cook their lubricant away. That's why the run closest to the pipe is usually the first section to bind.
Cold weather exposes the problem. Water that sat in the housing all autumn freezes overnight, and one morning the lever won't move at all. If that's your situation, don't force it.
Pulling hard on a frozen cable is how the lever assembly or the equalizer bracket gets bent.
What actually frees a sticky cable
A cable lubricator clamp forces lubricant down the housing under pressure. It works best on a cable that's stiff but not yet rusted solid.
Use a dry PTFE-based cable lubricant for parking brake runs. Wet oil-based products attract dust, which turns into grinding paste inside the liner.
Be honest about the odds here. Once rust has eaten into the strands, lubrication buys you weeks, not years. Treat it as a stopgap that gets you to a replacement, not a repair.
When replacement is the only sensible call
Replace the cable if any of these apply:
- The adjuster nut has bottomed out on its thread and travel is still too long
- The inner cable won't move by hand after disconnecting it
- Strands are broken or the housing is cracked
- The cable is kinked from a jack or a road strike
- One rear cable moves and the other doesn't
- The self-adjuster can't keep up because the cable keeps changing length
Cable replacement is a bolt-on job on most cars. Access is the hard part. Exhaust sections, heat shields, fuel tank straps, and interior trim all get in the way depending on the layout.
On some models the front cable runs inside the cabin under the console. That turns a 30-minute job into a two-hour one, mostly spent removing plastic clips without breaking them.
What replacement parts actually cost
Prices vary by model, but the spread is wide enough to plan around. Here's what our research on parts pricing shows for common passenger cars.
| Part | Typical price range | Notes |
|---|---|---|
| Single rear cable | $20 to $60 | Most common replacement |
| Front cable with equalizer | $40 to $120 | Often dealer-only on older models |
| Full cable set | $80 to $250 | Worth it on a 10-year-old car |
| Cable adjusting nut and hardware | $5 to $25 | Buy new, not used |
| Drum brake hardware kit | $15 to $40 | Springs, clips, self-adjuster |
| Parking brake shoes (drum-in-hat) | $30 to $90 per axle | Often separate from service shoes |
| EPB actuator motor | $150 to $600+ | Some OEM units run higher |
| EPB caliper assembly | $250 to $700+ | When the actuator isn't sold separately |
The premium-versus-budget question plays out the same way it does with steering and suspension components. Spend more and you usually get better corrosion protection, not a different design. On a car you plan to keep through ten winters, that matters.
OEM cables fit correctly the first time. Aftermarket cables sometimes run a little long or short, which eats your adjustment range before you've even started. If the price gap is small, take the factory part.
Passing the MOT and State Safety Inspections: Brake Efficiency Explained
Inspection is where a lazy adjustment stops being a private problem. Testers measure the brake, not the lever feel, and the numbers are unforgiving.
What the tester actually measures
The standard tool is a roller brake tester. The wheels sit on rollers, the brake is applied, and the machine calculates braking force as a percentage of the vehicle's weight.
The DVSA MOT inspection manual sets the parking brake requirement at 16% efficiency for most cars. That's a low-looking number until you realise how many cars fail it. Full criteria live on the DVSA pages.
Some vehicles can't go on rollers. Permanent four-wheel drive, certain limited-slip differentials, and some electronic parking brake systems get a road test with a decelerometer instead. Same requirement, different method.
Why cars fail on the parking brake
Corrosion leads the list in cold, salty regions. A cable that worked in September seizes by January, and the lever goes light.
Worn shoes come second. A driver who never uses the parking brake on an automatic can go years without noticing the shoes have worn or the star wheel has seized.
Third is a slack cable nobody adjusted. The lever pulls to the ceiling, the tester sees 9% efficiency, and the car fails on a system the owner never thought about.
Electronic parking brakes fail for different reasons. Warning lights, actuator faults, and calibration that never completed after a pad change all show up as a fail even when the brake mechanically works.
Ten-minute checks before test day
- Pull the lever and count clicks. Compare to your factory spec.
- Confirm the lever returns fully on its own.
- Check the warning light behaviour on ignition.
- Look at the cable ends at both rear wheels for fraying or a split boot.
- Spin each rear wheel with the brake off. Listen for drag or grinding.
- Apply three clicks and confirm both wheels resist evenly.
- Check the lever boot and ratchet for splits or missing teeth.
- Make sure the parking brake holds on a real incline, not just flat ground.
If your car has an electronic parking brake, also confirm the switch applies and releases without a delay or a flashing light. A weak battery causes more EPB faults than any mechanical problem, so a slow-cranking engine before the test is a warning sign.
The US picture is a patchwork
There's no federal periodic safety inspection in the United States. FMVSS 135 sets how the brake must perform when new, but nobody checks it annually.
That job falls to individual states. Some run annual safety inspections with a parking brake check. Some run them only in certain counties.
Some dropped the requirement entirely in recent years.
| Region | Parking brake requirement | How it's checked |
|---|---|---|
| UK (MOT) | 16% efficiency for most cars | Roller brake tester, or road test with a decelerometer |
| EU (periodic inspection) | Per UN Regulation 13-H and national rules | Varies by member state, usually rollers |
| Australia (ADR 31) | Performance standard for the system design | State-based inspection regimes |
| US states with safety inspection | State-specific, often a hill hold or roller check | Varies widely by state |
| US states without inspection | No periodic check | Owner's responsibility only |
The practical takeaway is simple. If your state doesn't test it, nobody is going to catch a slack parking brake except you. That's not a reason to relax.
It's a reason to do the drag test yourself once a year.
When to Stop and Hand It to a Shop
Knowing when to stop is a skill. Some jobs are a wrench and twenty minutes. Others will eat your weekend and leave you with a car you can't drive.
Red flags that mean put the tools down
Stop and reassess if you find any of these.
- Brake fluid at the wheel. A wet wheel cylinder or axle seal means the shoes are contaminated and the hydraulic side needs work. Adjustment won't fix it.
- A soft or sinking brake pedal. That's hydraulic, not mechanical. Don't drive it far and don't adjust anything until it's diagnosed.
- A snapped cable end inside the drum. Retrieving it usually means a full teardown.
- A rusted solid equalizer or backing plate. Cutting and drilling on a brake bracket is a fabrication job, not maintenance.
- A snapped bleeder screw. Now you need to extract it without destroying the caliper.
- An EPB fault that survives a calibration cycle. Module-level diagnosis needs factory software.
- Any ABS or stability control light alongside the brake warning. The system is telling you something specific and you need to read it.
When the tool cost beats the labour cost
Sometimes the honest answer is that the tool costs more than paying someone. A capable scan tool with EPB functions runs a few hundred dollars. Drum brake spring pliers, a brake spoon set, and a decent torque wrench add up too.
If you'll use them once, buy the labour instead. If you plan to keep doing your own brakes for the next decade, the tools pay for themselves in one job.
What a shop should charge
| Job | Typical labour time | Typical total |
|---|---|---|
| Cable adjustment only | 0.3 to 0.5 hours | $50 to $120 |
| Drum inspection and star wheel adjustment | 1 to 1.5 hours | $120 to $280 |
| Single rear cable replacement | 0.8 to 1.5 hours | $150 to $350 |
| Full cable set replacement | 2 to 3 hours | $350 to $700 |
| Parking brake shoes, drum-in-hat | 1.5 to 2.5 hours | $250 to $550 |
| EPB actuator replacement | 1 to 2 hours plus diagnosis | $400 to $1,000+ |
Diagnostic fees are separate on the electronic jobs. Ask upfront whether the shop charges a diagnostic hour before quoting the repair. Many do, and it's fair, but you want to know before you agree.
Questions worth asking before you book
Ask whether they'll inspect the shoes and drums as part of the adjustment. A shop that only turns the cable nut is doing half the job.
Ask what happens if the cable is seized. Get a price for that scenario before they start, so you're not deciding under pressure.
Ask whether they'll give you the measured efficiency or the click count afterward. A good shop writes it on the invoice.
Driving with a brake that won't hold
Be realistic about risk. An automatic with a working parking pawl on flat roads is a manageable short trip to a garage. A manual car on hills is not.
Don't substitute the parking pawl for a working brake over weeks. Don't park on an incline and hope. And don't hand the keys to someone else without telling them.
Modern electronics add a layer to this decision. Owners already get confused by keyless entry versus remote unlocking systems and what happens when a fob battery dies. An electronic parking brake that won't release is the same category of problem: the car is fine, but it needs the right procedure or the right tool.
Frequently Asked Questions
Can you adjust a parking brake without removing the wheels?
Yes, on many cars you can reach the cable adjuster nut with the wheels on. But you can't check shoe condition or set the star wheel properly that way. Removing the rear wheels takes ten extra minutes and turns a guess into a real diagnosis.
How many clicks should a handbrake have?
Most manufacturers specify somewhere between four and eight clicks from fully released to fully engaged. Your car's exact number lives in the factory service manual. Some models specify a lever force in Newtons instead, which is more repeatable than counting clicks by feel.
Why does my handbrake still not hold after adjusting it?
The usual cause is worn or contaminated shoes sitting too far from the drum. Cable tension can't close a gap that the star wheel is supposed to manage. Pull the drum, check lining thickness, and inspect for a leaking wheel cylinder before touching the cable again.
Can you adjust an electronic parking brake yourself?
Yes, if you have a scan tool that supports the EPB service function for your model. You enter service mode, retract the pistons, service the pads, then exit and run the calibration cycle. Without the tool, forcing the piston will damage the actuator.
Does adjusting the parking brake affect normal braking?
Not when it's done correctly. A properly adjusted parking brake leaves free play so the shoes clear the drum when released. Over-tighten it and the rear brakes drag constantly, which overheats them and can warp rotors.
How often should a parking brake be adjusted?
Check lever travel once a year, and again after any rear brake work or a failed inspection. Cars in salty winter regions benefit from an annual cable inspection too. New cables and new shoes should be rechecked after 200 to 500 miles.
